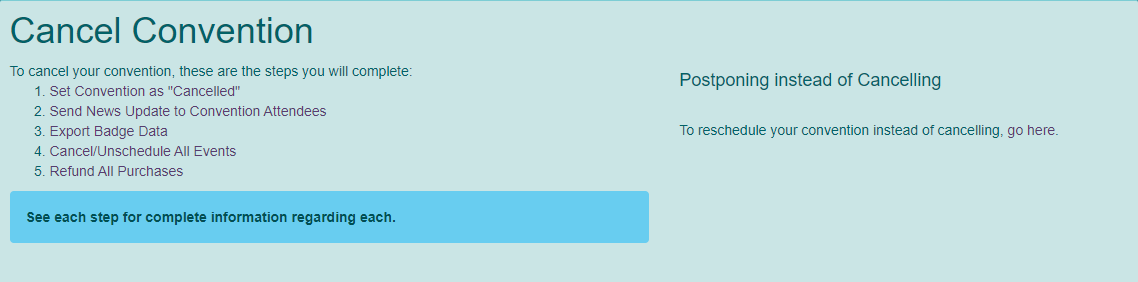
Cancel Convention
Tabletop.Events offers a cancellation feature that will allow you to mark a convention cancelled, walk you through the steps to export your data, cancel events, and ultimately refund all your purchases as needed. You can choose to do some or all of the steps, based on how you wish to handle your convention's cancellation.
Cancel Convention
- Go to Convention Tools > Convention Setup > Cancel.
- This will display the Cancel Convention screen.
Step 1: Cancel Convention
This step will cancel your convention and suspend registration, exhibitor / sponsors and volunteer functions. You will not be able to use the typical method for refunding order items.
- In the Step 1: Cancel Convention section, enter your password for your TTE account in the Confirm Your Password field.
- Click "Set Convention to "Cancelled"".
- A system message will appear.
- Click "OK".


Step 2: Inform Attendees, Volunteers, Exhibitors
Depending on how you've been communicating with your attendees, you should notify them by email or news update that your convention is cancelled.

Step 3: Export Badges and/or other data
Later in step 5 all sales information including badges, tickets, merch, booths, booth add-ons and sponsorships will be deleted. If you wish to preserve that information, please export it now.

Step 4: Cancel/ Unschedule All Events
Step 4 will go through all events and cancel them in bulk. Event cancellation emails will go to attendees, but tickets are not refunded at this time.
- In the Step 4: Cancel / Unschedule All Events section, enter your password for your TTE account in the Confirm Your Password field.
- Click "Cancel All Events".
- A system message will appear.
- Click "OK".
- You will have to return to this page to determine when all events are cancelled.


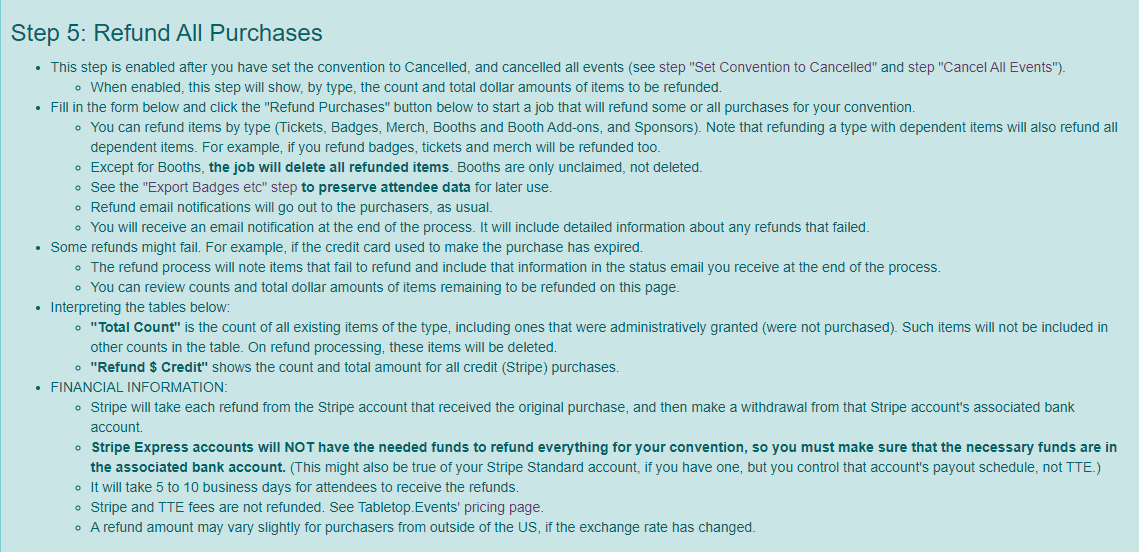
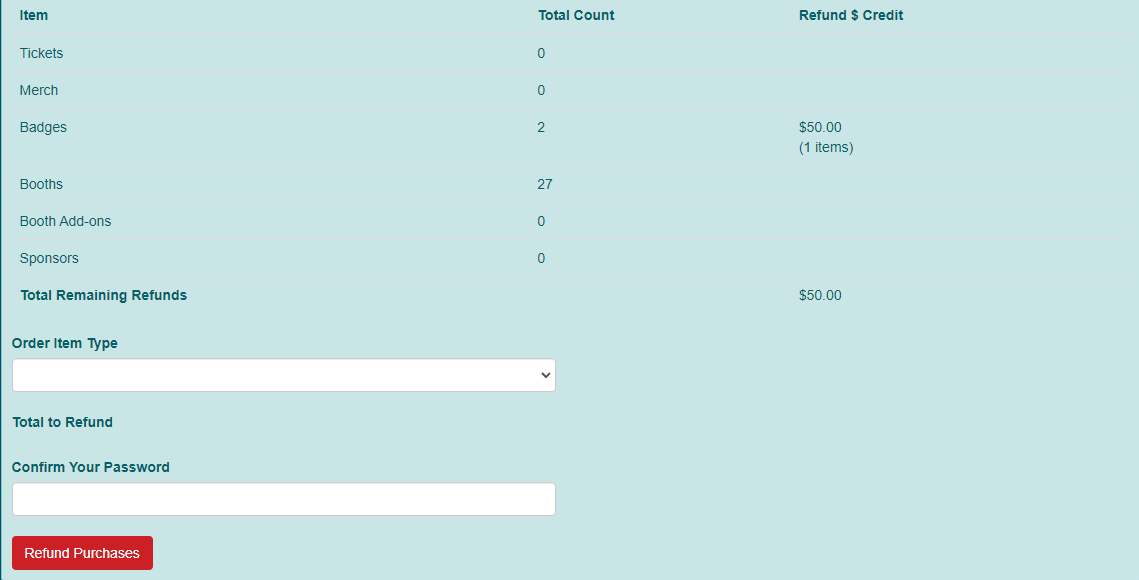
Step 5: Refund All Purchases
Step 5 will refund all order items. Depending on your Stripe account type, you may need to add funds in order to cover the refunds. Please read all the text carefully.
- In the Step 5: Refund All Purchases section, choose the Order Item Type from the drop down list. You can choose All Items.
- Enter your password for your TTE account in the Confirm Your Password field.
- Click "Refund Purchases".
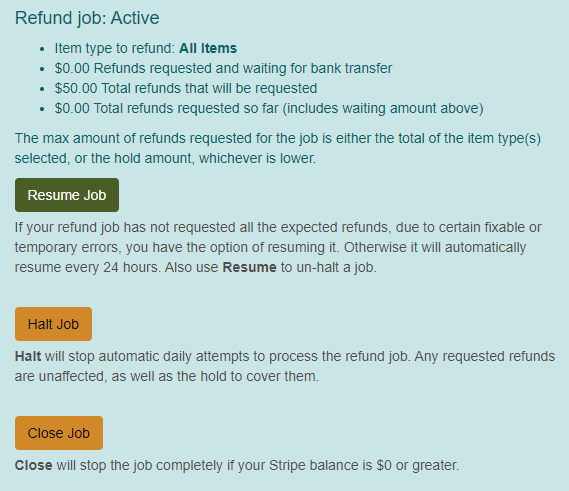
- A system message will appear.
- Click "OK".
- Click "Resume Job".
- A system message will appear.
- Click "OK".
- The refund job will run over the course of a few days depending on whether or not your Stripe account has funds to cover the refunds you are issuing. Periodic email updates will be sent to your Group Leader. You may choose to Resume Job, Halt Job or Close Job as needed.