Manage Scheduling Module (Events)
After you have opened event submissions for your convention,
attendees are free to submit events for your convention.
This document will walk you through the work flow and system generated emails for the submission process. Additionally, various management functions are detailed to assist you in managing events for your convention. All emails that are sent to hosts during this process are sent from the convention to the host's TTE account email address. This is because some conventions allow hosts to submit events before they have a badge to the convention.
Submission
Workflow
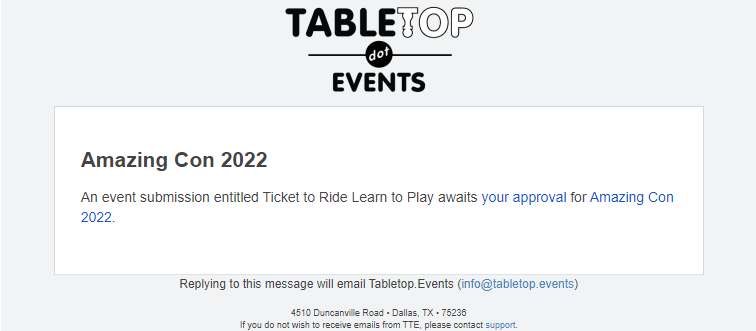
- When an event submission is completed, the group leader (and anyone with the Scheduling privilege) will receive a notification email from TTE.
- You may use the link from the email, or you can go to Convention Tools > Scheduling > Submissions.
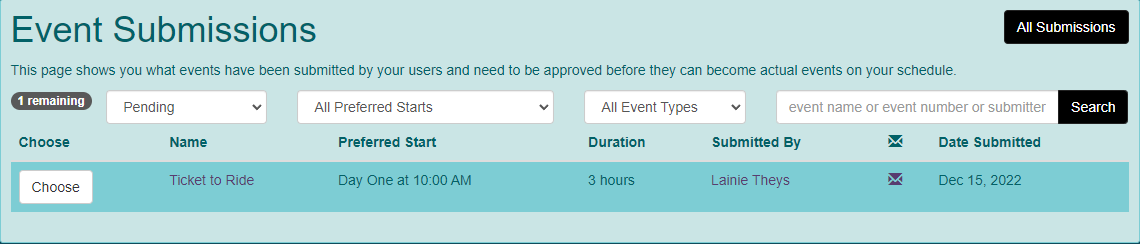
- This will display the Event Submissions screen.
- From this page, you can choose filter to the submissions using status, preferred start times, event types or custom.
- Clicking on the All Submissions button will show you submissions with all statuses (including approved).
- Click "Choose" next to the submission you want to review.
- When reviewing the application, you will see everything submitted by the attendee.
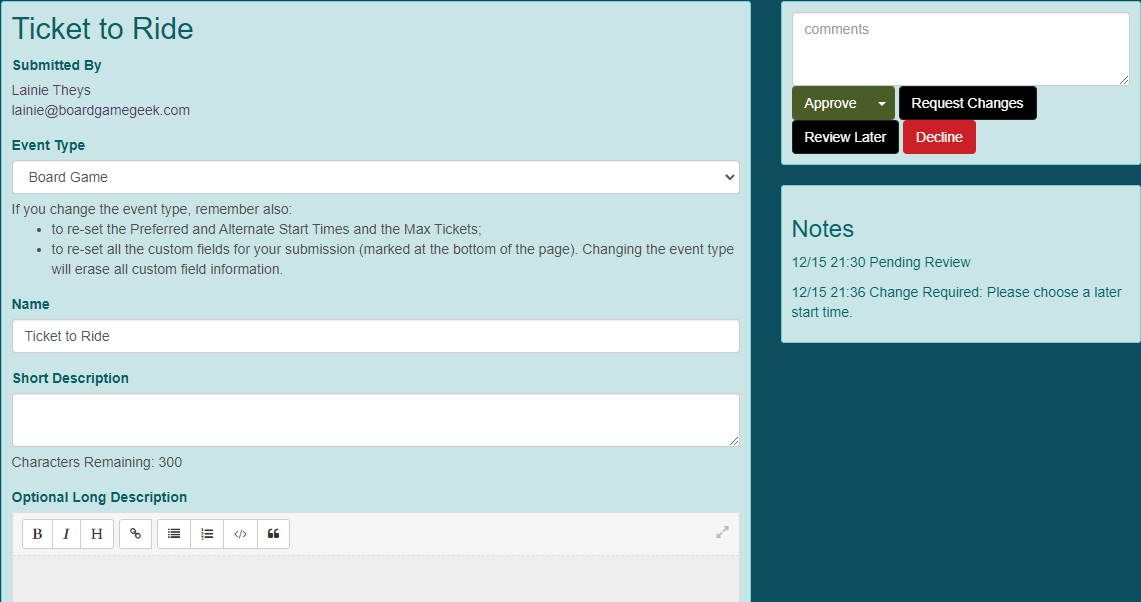


Review Later
- If you want to wait to review the submission until a later time, click "Review Later".
- You can always see the submission later by selecting the In Review filter.
Request Changes
- If changes are required before approving the submission, enter a comment to the right of the screen.
- Click "Request Changes".
- An email is sent to the host.
Decline
- If you do not wish to have this event at your convention, enter a comment to the right of the screen.
- Click "Decline".
- An email is sent to the host.
Approve
- When you are ready to approve the submission, you can click "Approve". Note: If you are using Auto-Scheduler, you can click the arrow next to "Approve" and select the priority to which you are assigning the event.
- When an event submission is approved, a new event record with a unique event number is created. The host will be able to see in the Host > Submissions menu that their submission is Queued for Scheduling. They will not receive an email regarding their event submission's approval until event scheduling is complete.
Edit Submission
Submissions can be edited after they are created by the host before they are approved. Once a submission is approved and the new event record with the unique event number is created, only convention organizers can edit the event record.
Events
View
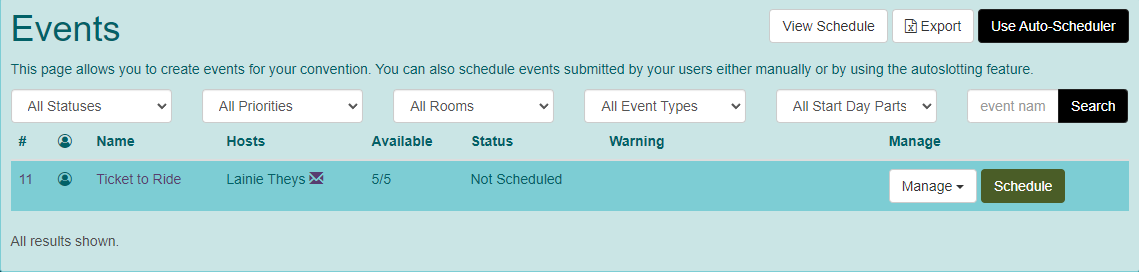
- Once a submission is approved, a new event record with a unique event number is created. You can view the list of events by going to Convention Tools > Scheduling > Events.
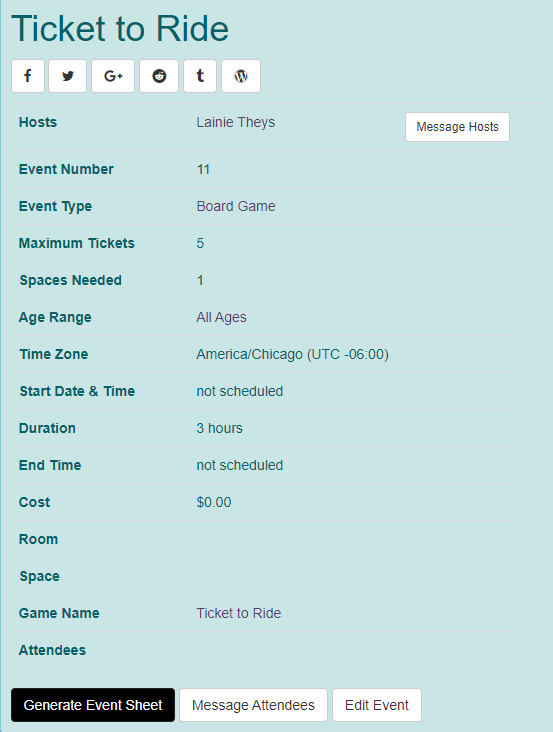
- To view an individual event as it will show to attendees once it is scheduled, click the arrow next to "Manage" and choose View.
Edit
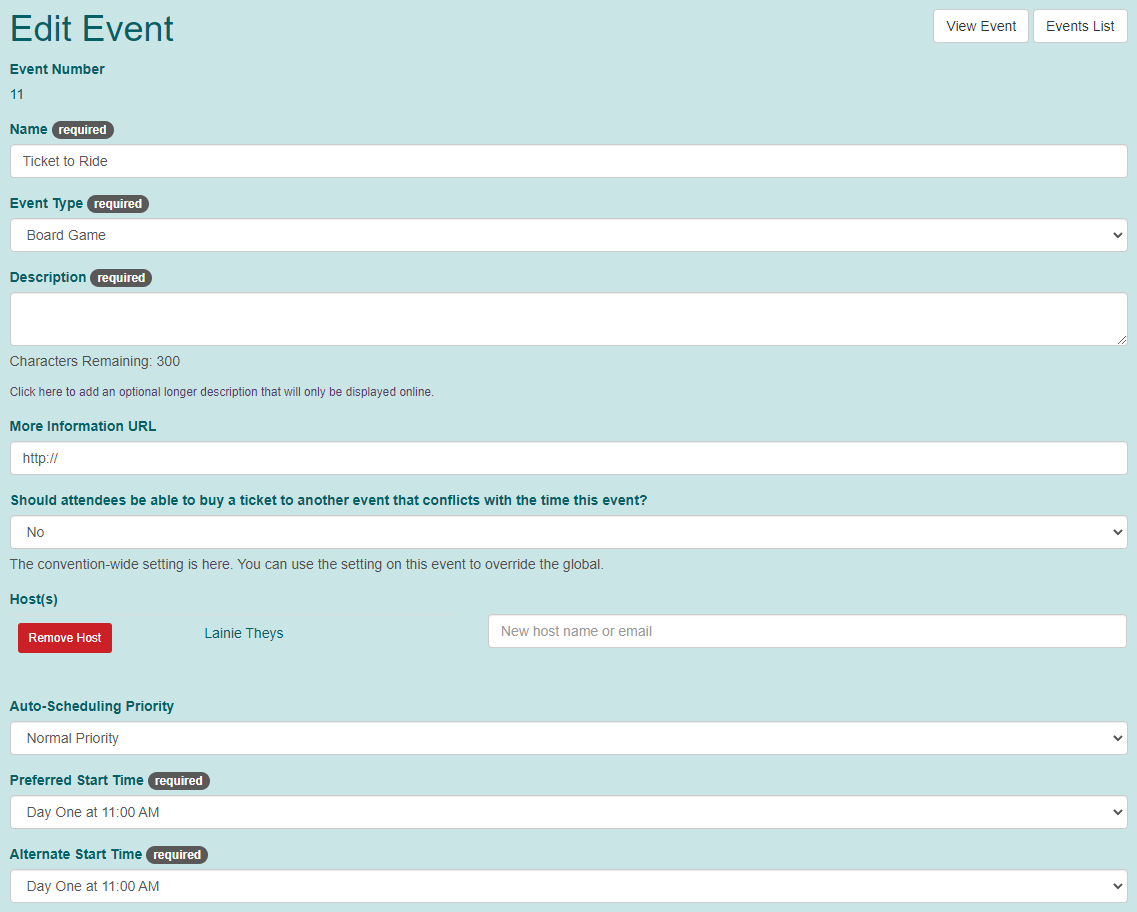
- To edit an individual event, click the arrow next to "Manage" and choose Edit or click the # next to the event.
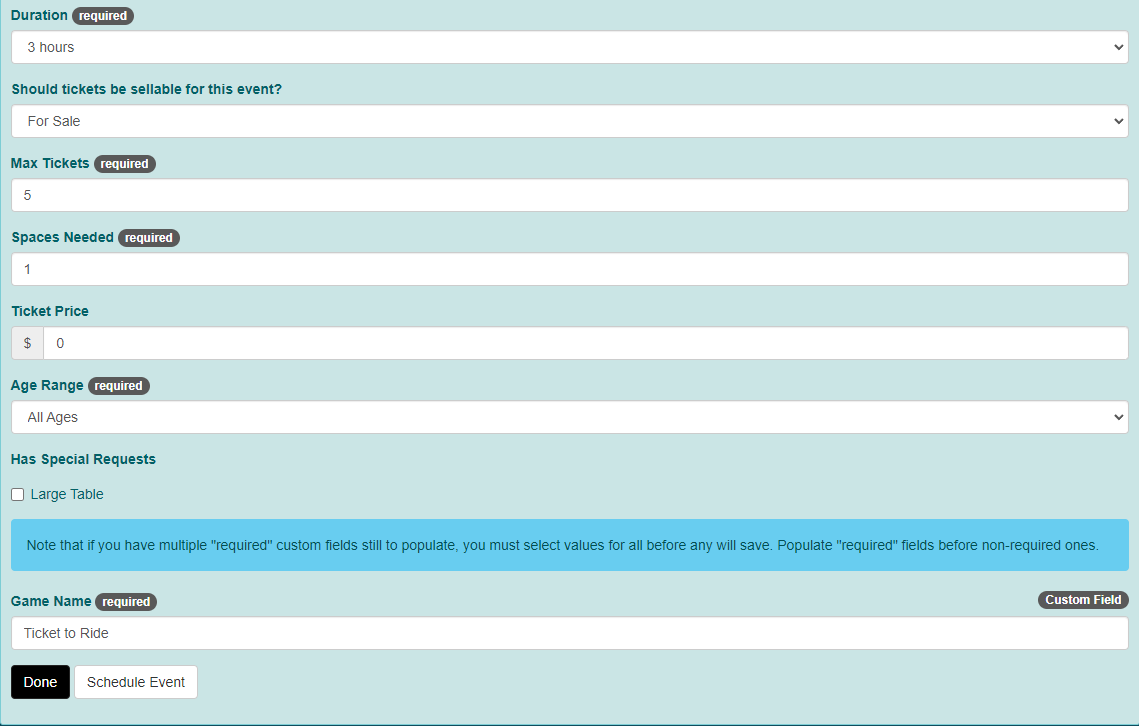
- In addition to the fields available to the host, you can also see these additional fields:
- Should attendees be able to buy a ticket to another event that conflicts with the time this event? Although you set this globally during the activation process, you can choose to allow double-booking on an individual event level.
- Hosts You can add, remove or change hosts for the event. To add a host, type the new host email into the field on the right. A list of TTE users will display and you click "Choose" next to the appropriate host. To remove a host, click "Remove" next to the host name.
- Auto-Scheduling Priority You can change the priority that was set during the Approval process here.
- Should tickets be sellable for this event? If you want to display an event for informational purposes only (i.e. Game Library times), you can choose to have the event as Not for Sale. If you wish to hide an event, choose Hidden From Public.
- Ticket Price This was set globally during the activation process, however, you can choose to set a specific ticket price on an individual event level.
- Click "Done" when you are finished editing the event.
Create Events
You may need to create events for your convention that will not go through the submission process described above.
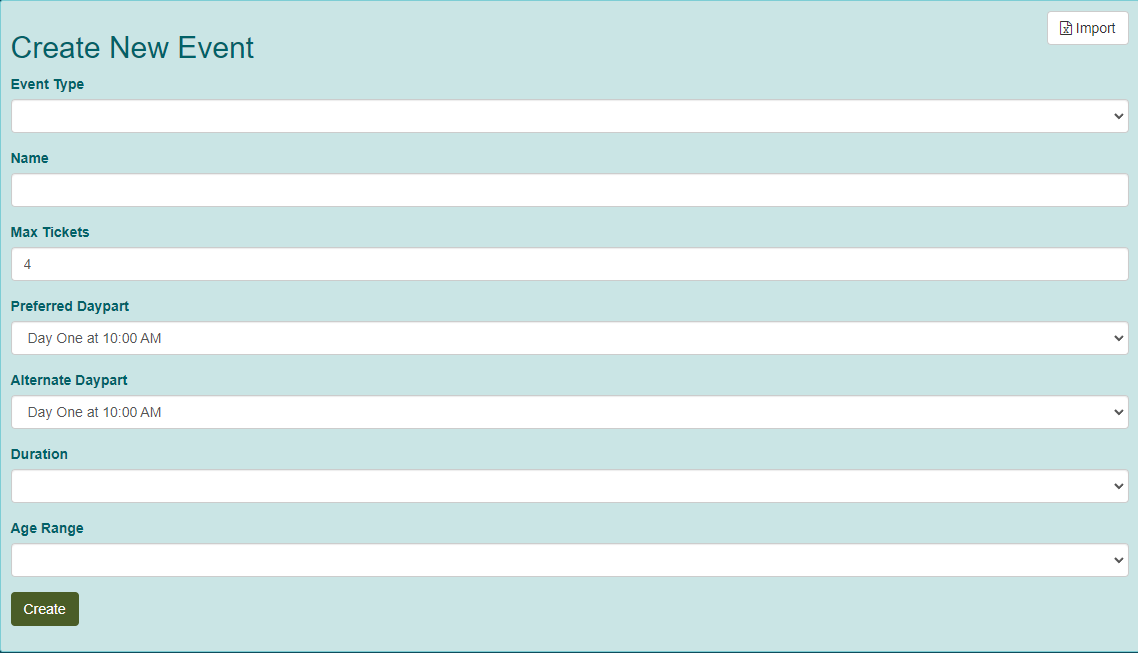
- To create a new event, scroll down below the Events section to the Create New Event section.
- Complete all fields, and click "Create".
Bulk Import
Instructions for bulk importing events can be found in the Submit / Host Convention Event document.
Copy
- You can copy an event by clicking the arrow next to "Manage" and choosing Copy.
- All the previous information will be copied and a new unique event number will be assigned.
Mark in Review
- If an event was created through the submission process, you have the ability to send it back to the review process.
- Click the arrow next "Manage" and choose Mark In Review.
Delete
- An unscheduled event can be deleted by clicking the arrow next to "Manage" and choosing Delete.
- An email is sent to the convention organizer and host(s) with the scheduling privilege regarding the deletion.
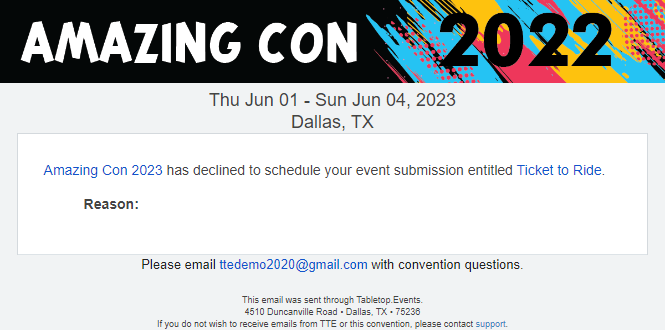
- If the event was created from an event submission, an email is sent to the host stating their event submission was declined.

Event Scheduling
Workflow and Emails
When an event is scheduled, an email will be sent to the host to let them know their event submission has been scheduled. This email is sent to the TTE account email of the host. 
Manual Scheduling
- To schedule an event, go to Convention Tools > Scheduling > Events.
- Click the arrow next to "Manage" and choose Schedule or click "Schedule" next to the event.
- The relevant information for scheduling the event will appear. From here you can also use the buttons to "View Event", "Edit Event" or "Events List"
- In the Available Slots section you choose the Rooms where you wish the event to be scheduled.
- The Day and Day Part fields will default to whatever the Preferred Day Part was.
- Click "Search".
- A list of all the spaces in the chosen room will show along with the dap parts that are needed to cover the duration of the event.
- Click on the space(s) you wish to use for the event.
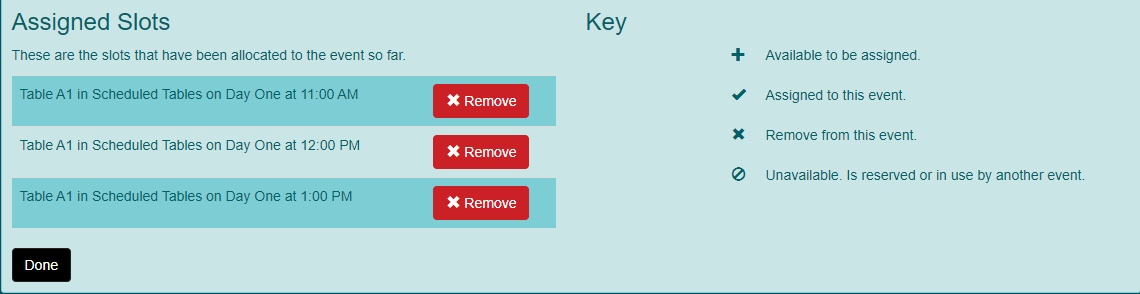
- The Assigned Slots section will be updated with your selection.
- You can remove individual slots by using "Remove" or you can remove the entire selection by clicking on the space in the above list.


Reserve Time Slots
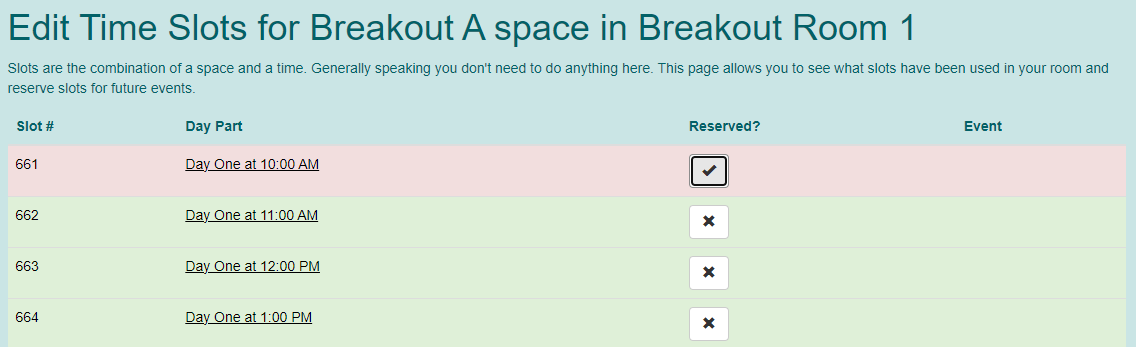
- You can reserve time slots in spaces to block events from being scheduled. Go to Convention Tools > Scheduling > Spaces and click "Manage" next to the space you are reserving. Choose Time Slots from the drop-down list.
- Click the "X" next to the time slot to be reserved.
Auto-Scheduler
- Auto-Scheduler is a feature which will automatically schedule each of your events automatically. An email is generated afterwards letting you know when the task is complete and any errors that may occurred. Auto-Scheduler can be run multiple times for a convention as new events are added. If you wish to manually schedule certain events, those should be done prior to running the auto-scheduler.
- Auto-scheduler will not attempt to schedule events that request more than one space.
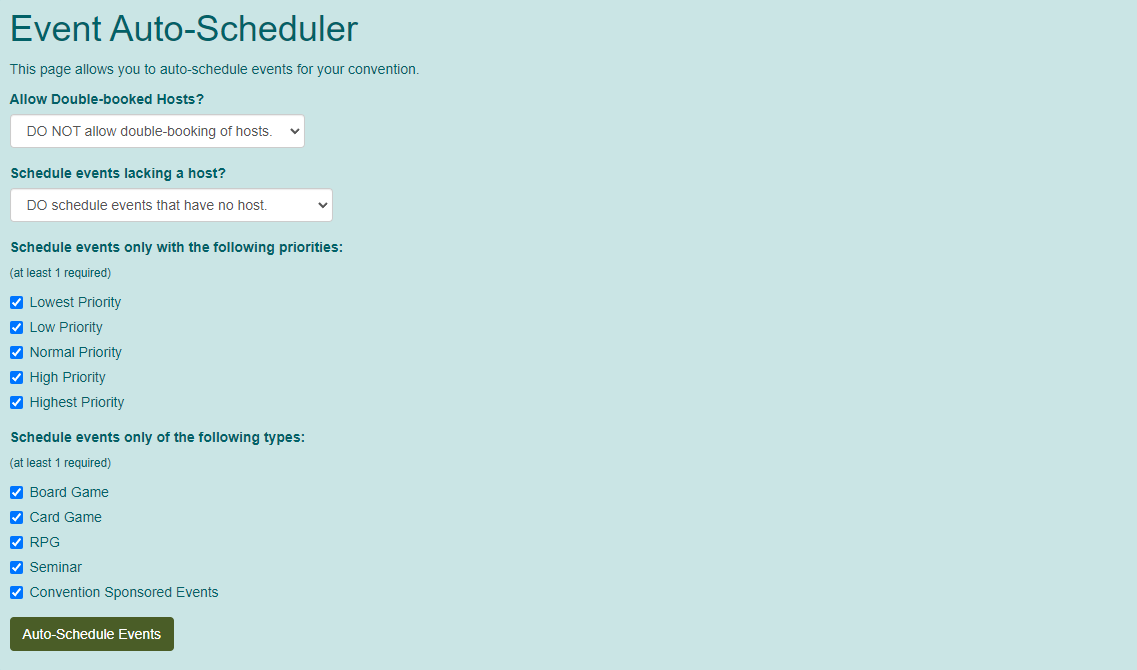
- To use this feature, click "Use Auto-Scheduler" at the top right of the event list.
- Allow Double-booked Host? You can determine if the auto-scheduler can double book hosts.
- Schedule events lacking a host? You can determine if the auto-scheduler can book events that do not have a specified host.
- Schedule events only with the following priorities: Using the priority you set when approving an event submission, you can determine what priorities this round of auto-scheduling will attempt.
- Schedule events only of the following types: You can limit the types of events that auto-scheduler attempts.
- Click "Auto-Schedule Events".
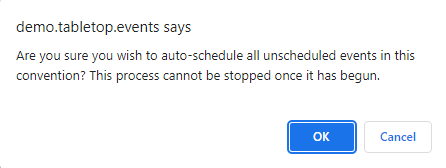
- The system will prompt you to be sure this is the appropriate action.
- Click "OK".
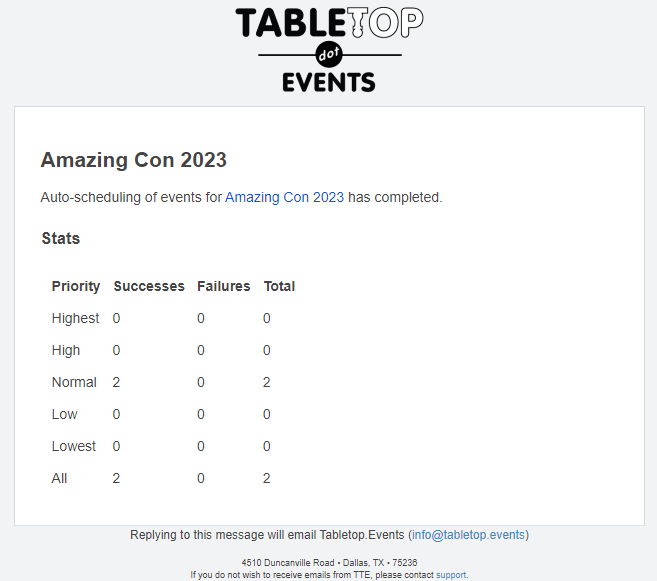
- When the system has completed the process (this may take a bit depending on the number of events, spaces, etc.), you will receive an email.
Auto-Scheduler Programatic Priorities
- Schedule an event to the same space as that of other events with the same host.
- For events with multiple hosts, the utility uses only the first assigned host with regard to determining "same host".
- Schedule events with special needs to the spaces accommodating those needs.
- The utility will never schedule an event with a special need to a space that cannot accommodate that need. The system will alert you by email if it fails to find a suitable space for such an event (and therefore cannot schedule it).
- The utility will attempt to schedule events without special needs to spaces that do not accommodate any special needs; however, if it cannot, it will schedule such events to spaces that do accommodate special needs.
- When scheduling an event, prioritize spaces having the fewest events scheduled.
- This is to allow the best chance of scheduling multiple events having the same host to the same space.
- The utility groups together events with the same host, in order to schedule them one after another, and allow the best chance of scheduling those events to a single space. Again, for events with multiple hosts, the utility uses only the first assigned host for grouping.
Auto-Scheduler Programatic Workflow
The utility will step through the received scheduling priorities in order of highest to lowest.
For each scheduling priority, the utility will step through all events having a type included in the event types received from the auto-scheduler user interface. An event not having one of those event types is ignored. If you selected not to auto-schedule events lacking a host, the utility will ignore such events.
Where below the description says "the schedule attempt is a fail", this means that the utility creates an error message about the failure, and when the auto-scheduling job finishes, the system will send you an email with all generated messages.
For each event:
- The utility checks that the event has preferred dayparts for scheduling. If it does not, the schedule attempt is a fail.
- An event can have two start dayparts, a primary and secondary. The utility will attempt scheduling with them in that order.
- The utility will only attempt to schedule the event to the selected dayparts. If it cannot schedule to those dayparts, it will not schedule the event. (This counts as a fail, but not until the end of this process.)
- The utility will compare the event's preferred dayparts to those of already-scheduled events with the same hosts. If as a result no dayparts are available, the schedule attempt is a fail.
- If you specified that the utility should allow double-booking of hosts, it will skip this step.
- The utility checks that the event's type has rooms available for it. If it does not, the schedule attempt is a fail.
- The utility attempts to schedule the event to a space used by a previously-scheduled event with the same host. If it can't do this, it proceeds.
- The utility attempts to schedule the event to any available space.
- For this and the previous step, the utility will schedule events with special needs only to spaces accommodating those needs.
- If at this point the utility has not scheduled the event, the schedule attempt is a fail.
Event Warnings
The system will provide warnings for scheduled events. Here is a list of warnings, their most likely cause and possible resolutions:
Start date misaligned
- The earliest time slot assigned to this event is not set as the start time.
- This should normally correct itself. If you see this message, then it hasn't and you should Tabletop.Events.
Spans multiple days
- An event has crossed the border between 2 or more days. Unless you run a 24 hour convention, this should never happen.
- You should check the slots assigned to this event and set them up appropriately. Ignore this warning if you really do want it to span multiple days.
Spans multiple spaces
- An event is using more than one space within a room.
- In some cases for large events, such as tournaments, this is ok. If it is not ok, then remove some slots from this event. Ignore this warning if you really do want it to span multiple spaces.
Uses non-contiguous time slots
- An event uses time slots that have gaps. For example, it uses a 3pm to 4pm time slot and an 8pm to 9pm time slot. This will be confusing to attendees.
- Update the event schedule to use contiguous time slots.
Reporting scheduled, but not scheduled
- Event has a scheduled time, and will show up in the event schedule, but it is not actually using any slots on the schedule. This means that another event could get scheduled in the slots you intended to use for this event.
- Reschedule this event and ensure the time slots are allocated to it.
Duration does not match time slots used
- The event has a duration set that does not match up with the number of slots assigned to it. This can cause attendees to be able to create unforeseen conflicts in their schedule.
- If your event has a duration of 4 hours, and you use 1 hour time slots, then make sure you have 4 slots assigned to the event. Not more, not less.
Start daypart does not match the preferred or alternate daypart
- This event was scheduled at a time other than its host wanted it scheduled.
- Reschedule the event. If you really want the event at this time, then make sure you reach out to the event host and then you can ignore this warning.
The host is double booked during this event
- The person selected to host this event is assigned to one or more events that conflict with the times of this event.
- Remove the host from the conflicting events
Cancel Events
If you are trying to reschedule an event, go into the Schedule screen, remove the current assigned slots and re-schedule the event.
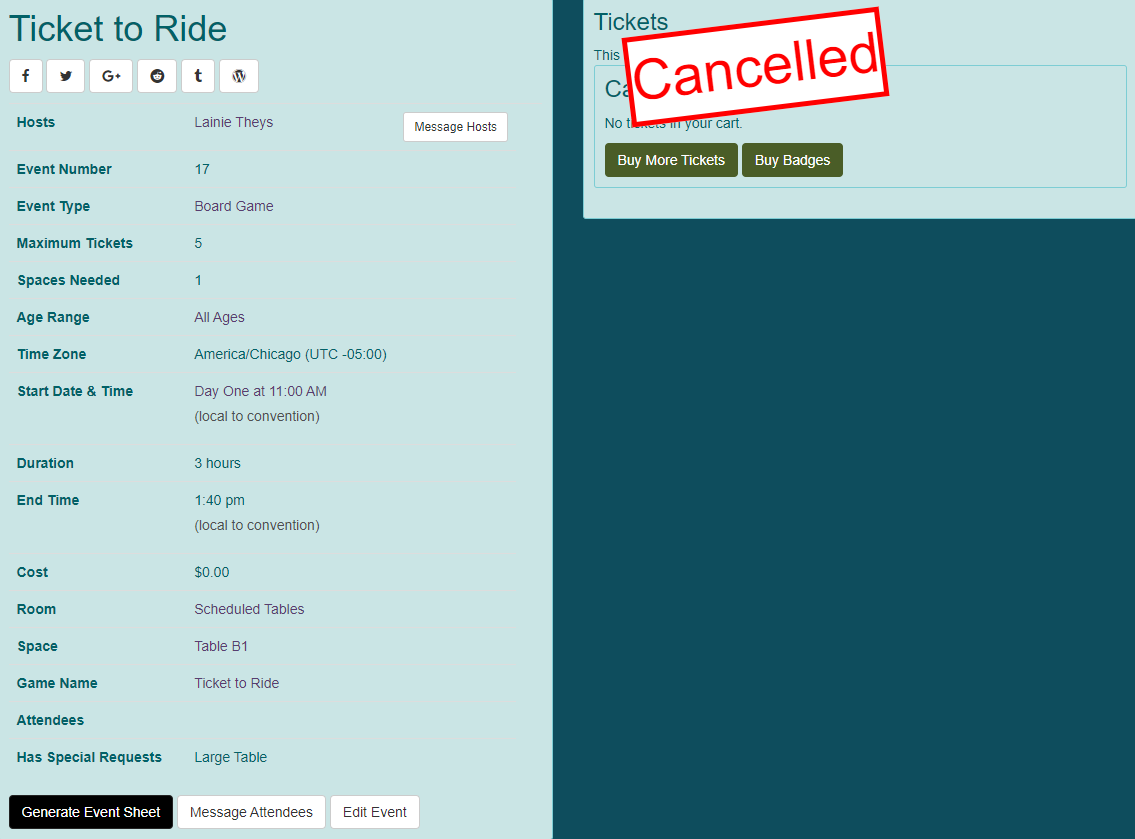
When you cancel an event, the system will update the event page, and refund any tickets that have been acquired for the event.
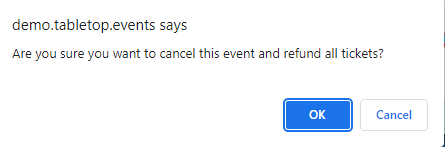
- From the event list, click the arrow to the right of "Manage" and choose "Cancel".
- The system will prompt you to be sure this is the appropriate action.
- Click "OK".
- Emails are sent to the host and all ticket holders letting them know of the cancellation and refund of tickets if applicable. If the event was from an event submission, the host will also get an event submission declined email.
- The event page will be updated.
Event Special Options
Attendee Reservations
In Scheduling Settings, you were able to allow hosts to reserve seats for themselves and attendees. If you have this option enabled, when the host was creating the event submission, they specified the number of reserved tickets for attendees. At that time, they were able to choose the attendees from their friends list to whom invites to purchase a ticket would be sent once the event is scheduled. If they reserved more spots than invites they created, the convention organizer will have to add the additional attendees. The organizer has the ability to reserve the spots for any TTE user (not just the host's friends). Those reservations can be added and/or modified through both Convention Tools > Scheduling > Submissions or > Events.
Event Sessions
It is possible to schedule a single event that will stretch across multiple sessions throughout your convention. This can be used for multi-stage games or tournaments. If you would like a host to designate that an event will have multiple sessions, you will need to create custom fields to capture any information you need at this point. Mutli-session events cannot use auto-scheduler.
When an attendee purchases a ticket for a multi-session event, all sessions of the event will appear on their schedule.
Creating
- The multiple sessions can be created by the organizer either through Convention Tools > Scheduling > Submissions or > Events.
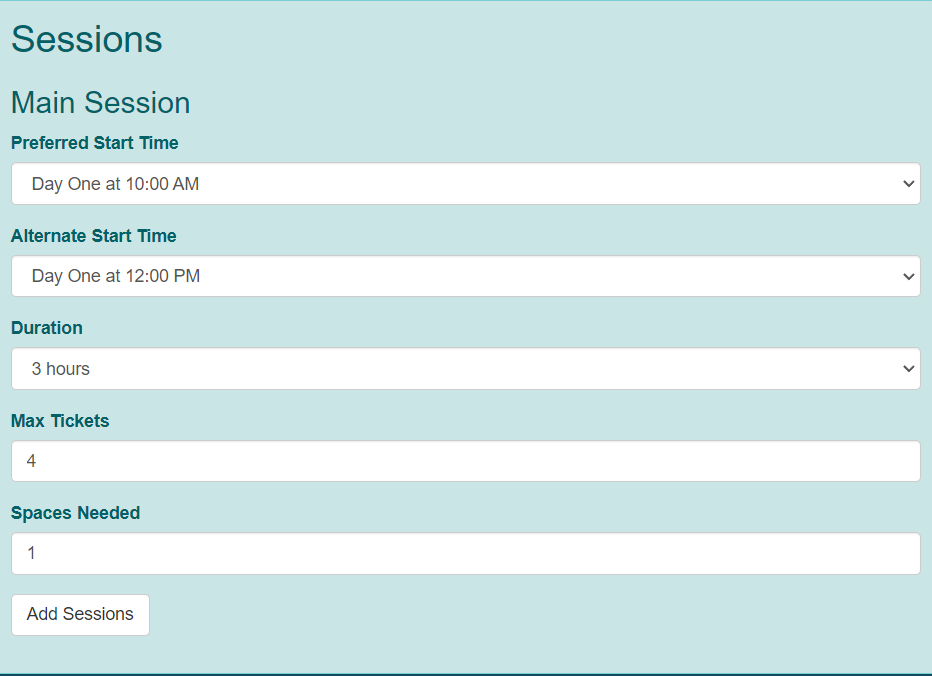
- To schedule additional sessions, go to the Sessions section. This will show the information from the submission.
- To add a session, click "Add Sessions".
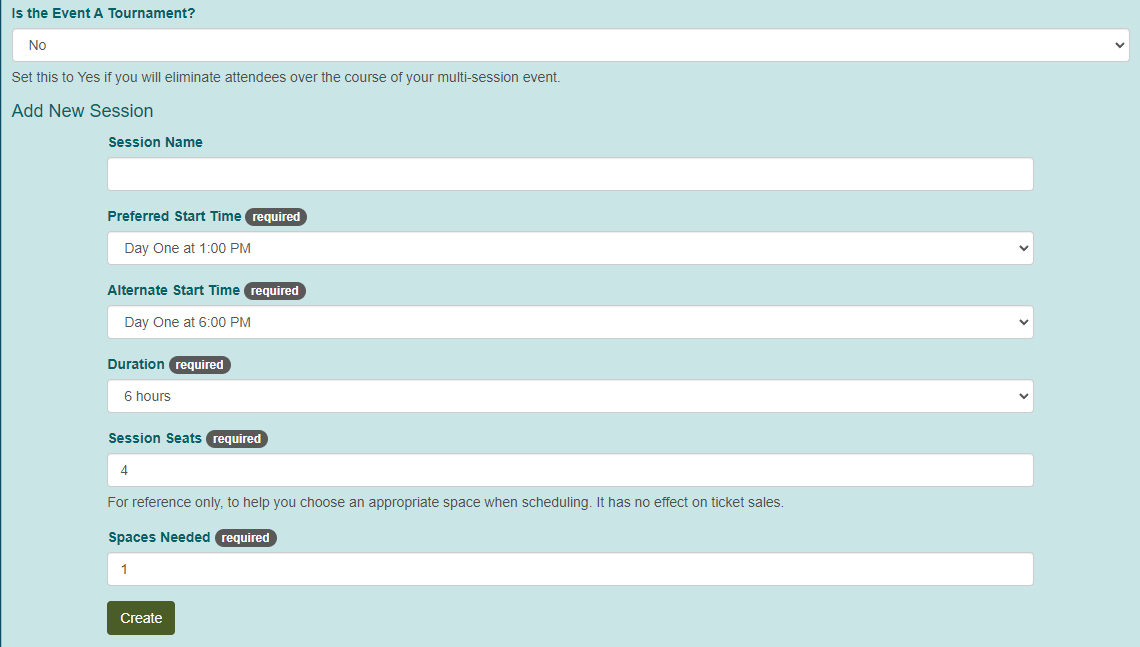
- Is this Event A Tournament?: If you plan to have attendees eliminated from one session to the next, choose Yes.
- Session Name: On the Schedule of Events this will display immediately after the event name.
- Preferred Start Time: What is the preferred start time for this session?
- Alternate Start Time: What is the alternate start time for this session?
- Session Seats: How many seats are needed for this session? The tickets sold for this event will use Max Tickets from the Main Session. Most of the time, this field will match the Max Tickets unless it is an elimination event.
- Spaces Needed: To aid in scheduling, how many spaces are needed for this event.
- Click "Create" when finished.
- Repeat as necessary.

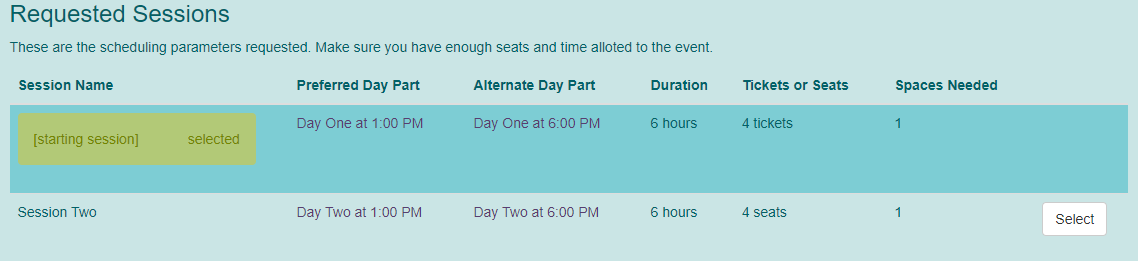
Scheduling
- On the Scheduling page, a new section is available for multi-session events:
- To switch between scheduling the different sessions, click "Select" next to the session you are currently scheduling.
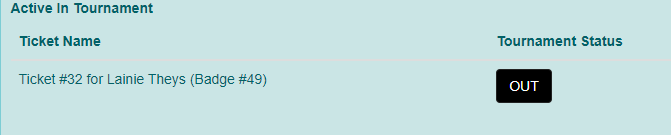
Dropping Non-Active Attendees from a Tournament
- To drop an event from an attendee's schedule once they've been knocked out of the tournament, edit the event under Convention Tools > Scheduling > Events.
- At the bottom of the page, click "OUT" for each eliminated attendee.
Event Messaging
As described in the Submit / Host Convention Events documentation, hosts can send messages to their attendees. When that message goes out, it contains the hosts email address and all further communication will be through whatever email system they are using.
Reports
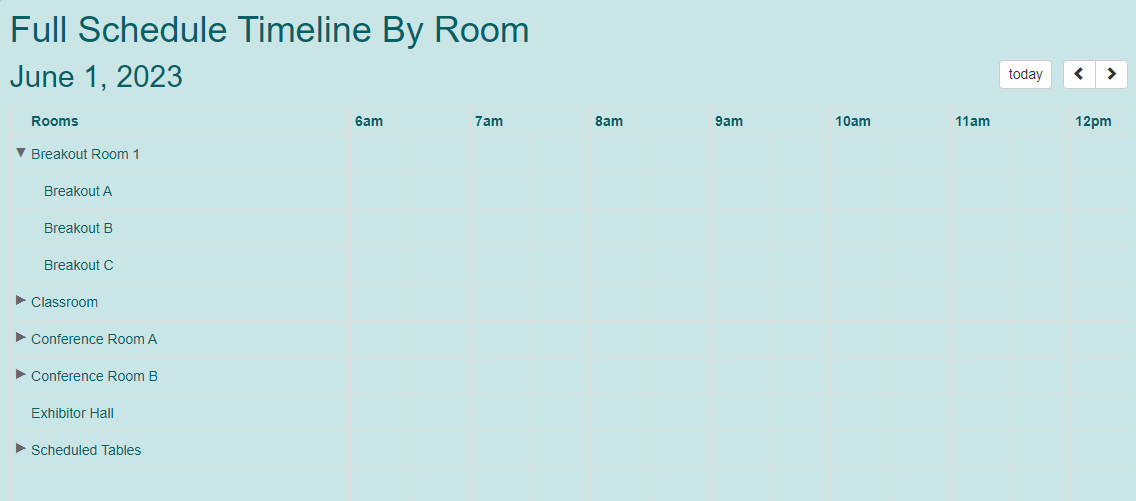
View Full Schedule Timeline By Room
- To see a timeline of all your events in a grid format of rooms / spaces and times, go to Convention Tools > Reports and choose Full Schedule Timeline By Room.
Print Event Schedule
- If you would like to see a printed listing of your events, go to Convention Tools > Reports and choose Print Event Schedule.
- Choose if you would like the schedule sorted by Day Part or Space. Printing by Day Part will print a page with all events ordered by the Day Part for which they are scheduled. Printing by Space will print a single page for each space will all events scheduled there.

Print Event Sheets
- If you would like to see a detailed print out of your event and all of it's details, go to Convention Tools > Reports and choose Print Event Sheets.
- Choose how you want the sheets sorter, and click "Generate Event Sheets".
- The report includes location, time, duration, host, max tickets, attendees and waiting list information.

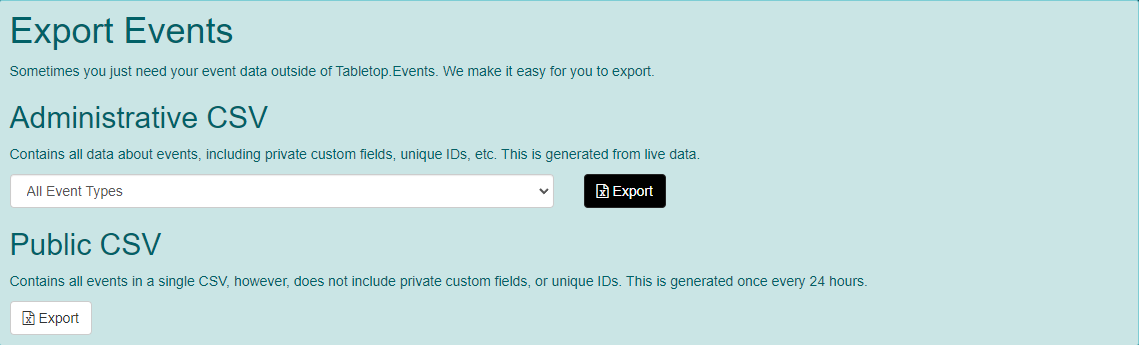
Export Events
- You can export your events by going to Convention Tools > Scheduling > Events and clicking "Export" at the top right corner of the screen. You can also go through Convention Tools > Reports and choose Export Events.
- The Administrative CSV reflects the most current data from your events schedule.
- The Public CSV reflects what the attendees see from the CSV that is generating nightly.