
Activate Scheduling Module (Events / Tickets)
Event configuration is in the Scheduling module. After you have completed creating your convention, you can activate this module and configure events to get them ready for creation and addition to the schedule. The Scheduling module can be configured when a convention is public or private. The second part of activating the Scheduling module is to configure tickets for sale. This may also be done when a convention is public or private; however, ticket sales cannot begin until a Stripe Standard Account is configured for your convention.
- Activate Schedule Module (Events / Tickets)
- Enable Event Management
- Define Event Types
- Define Rooms and Spaces
- Set Event Settings
- Open Event Submission
- General Ticket Settings
- Setup Discount Codes (optional)
- Open Ticket Sales
- Event Groups
- Event Reservations
- Tutorials
Activate Scheduling Module (Events / Tickets)
The Activate Scheduling Module Checklist is located to the right of the Getting Started Checklist. Expand the checklist for step-by-step instructions on event and ticket setup.
Enable Event Management
- Click on Enable Event Management or go to Convention Tools > Registration > Settings.
- This will display the Registration Settings Screen.
- Click the "Enable Event Management" button under Ticket Sales.
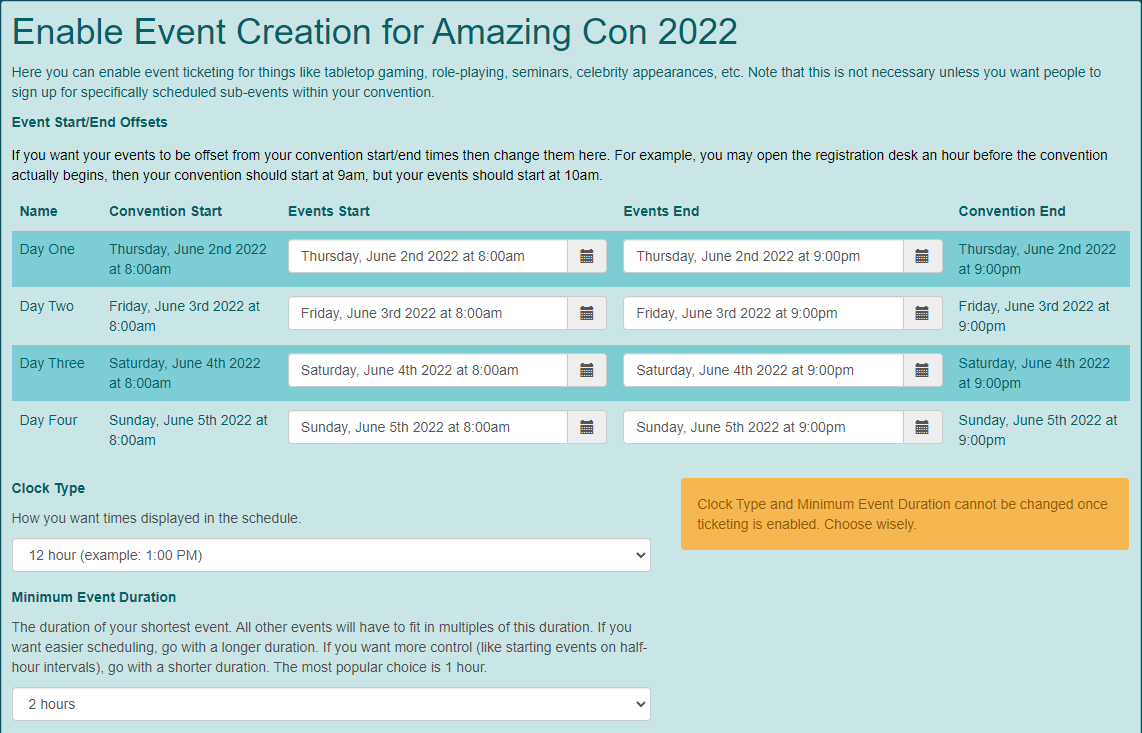
- This will display the Enable Event Creation for [convention name].
- Event Start/End Offsets: This section auto-populates the Attendee Start Time and Attendee End Time from the Convention Days screen. If you have a specific section of the day during which events can be scheduled, you can set the dates here.
- Clock Type: You can set the times to be shown using a 12 hour or 24 hour clock.
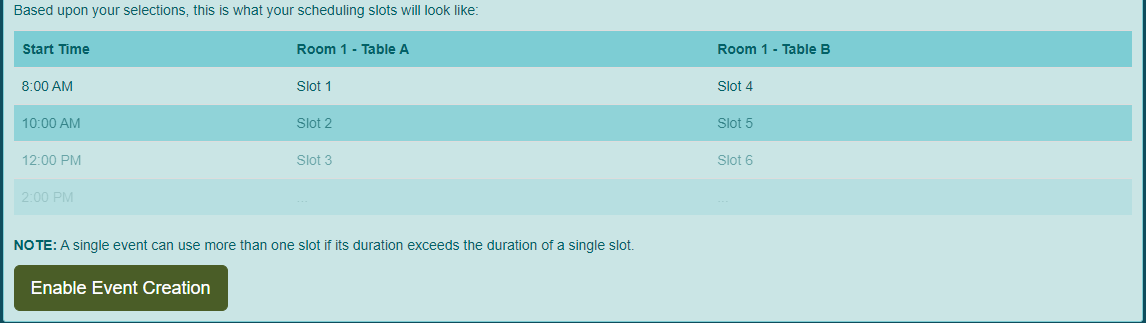
- Minimum Event Duration: You can set the duration of your shortest events. Other events will be able to choose other durations. The system defaults to 2 hour time slots; however, most conventions change this to a shorter duration. Below the drop-down box is an example of what your scheduling slots will look like based on the default selections.
- Click "Enable Event Creation".
- A system message will appear.
- Click "OK".
Define Event Types
Event Types allow you to group your convention events and set some basic structure around each type of event.
- If you are following the checklist step-by-step, you are already on the Event Types screen. If you are returning, click on Define Event Types in the checklist or go to Convention Tools > Scheduling > Event Types.
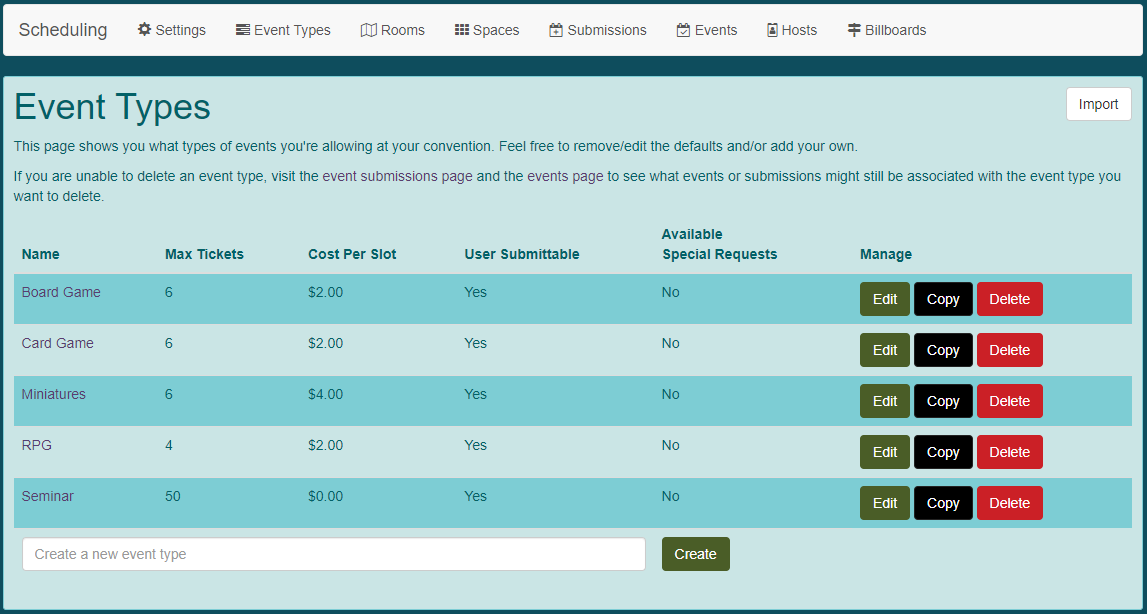
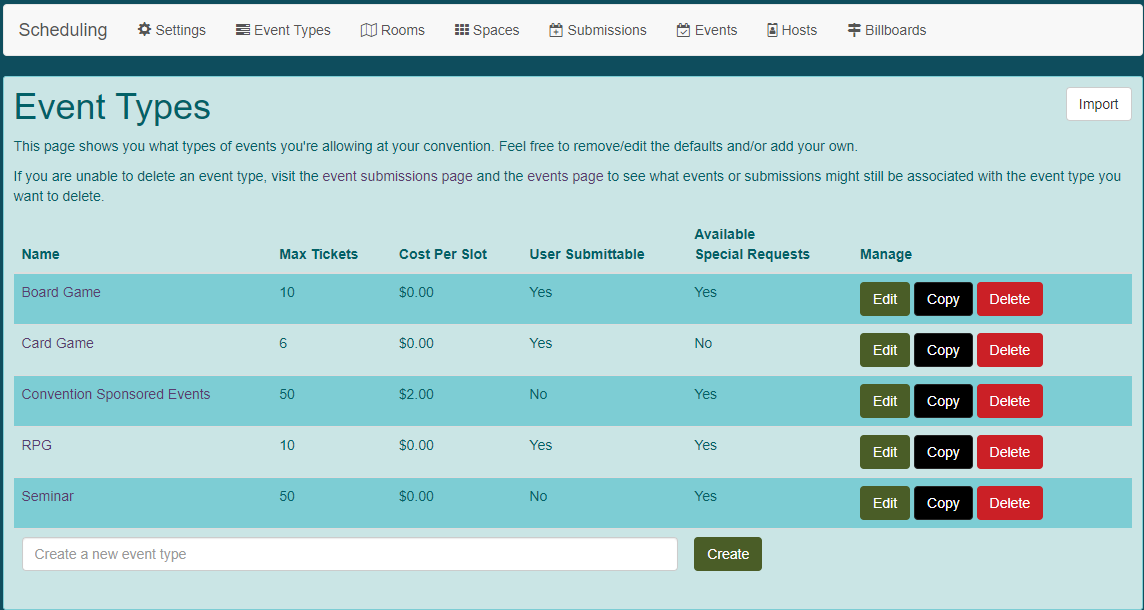
- This will display the Event Types Screen.
- The system automatically created Board Game, Card Game, Miniatures, RPG and Seminar. You can edit these to fit your needs or delete them and start fresh.
- At the bottom of the screen type in the name of an event type and click "Create".
- This will display the Edit Event Type screen.
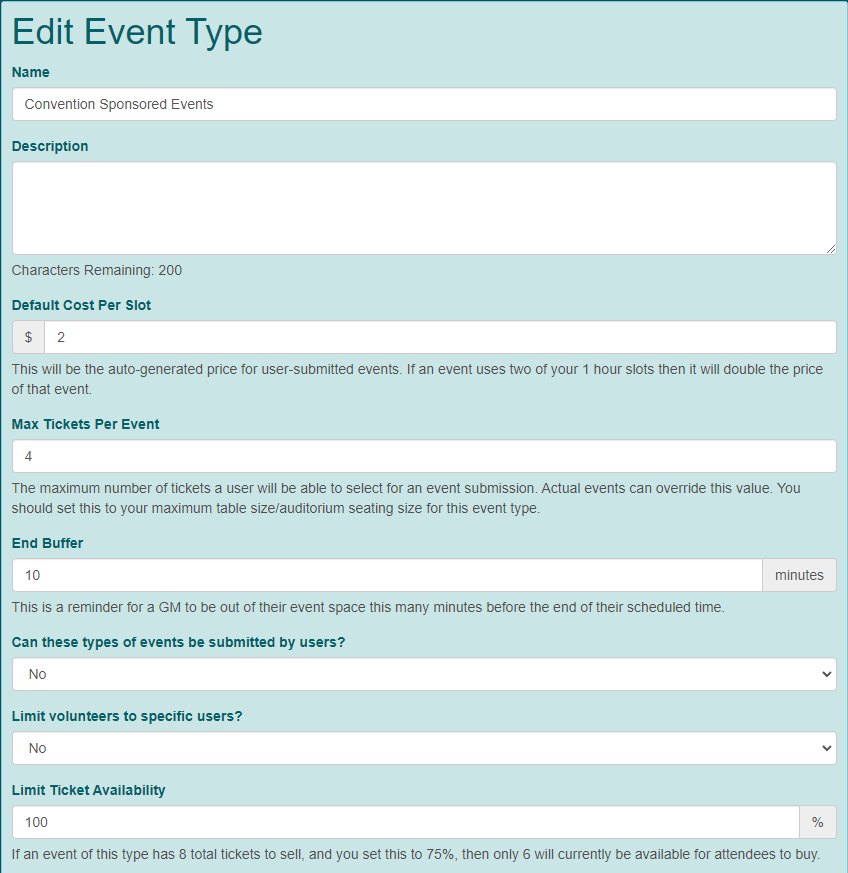
- Name This is the event type name you set upon creation.
- Description: This is a 200 character description of the event type. This will help your hosts determine which event type is appropriate for their event submission.
- Default Cost per Slot: This is the default price assigned to an event type. The price is set by time slot and will be multiplied by the number of time slots used by an actual event.
- Max Tickets per Event: This is the maximum number of tickets that are available for a space where this event will be located. Seminars may be set to the number of seats in a room whereas board games may be set to the number of seats available at certain convention tables.
- End Buffer: This will be shown to hosts to help them plan how much time their event will have. Note: This is just a reminder for hosts to leave that much time at the end of their session for tear down. It is not added to the total duration of the event.
- Can these types of events be submitted by users?: Will you allow hosts to submit events for this event type? Additional information on event submission for attendees can be found here.
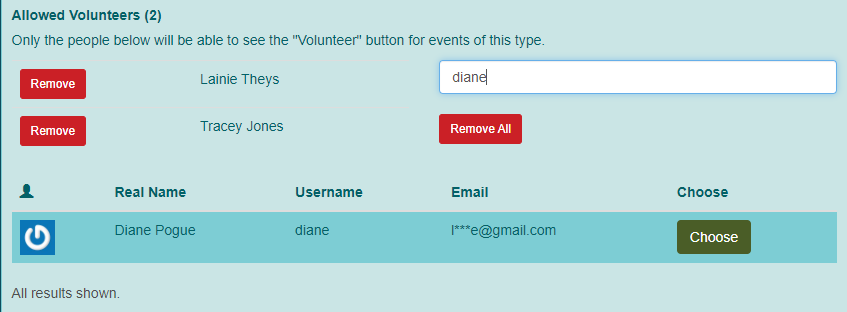
- Limit volunteers to specific users?: If you are creating an event (rather than it going through the event submission process), you can allow hosts to claim the event. If you want to limit the hosts who can claim events of this type, select yes. The following fields become available:
- Allowed Volunteers: By entering the email address of a TTE user, you limit only those hosts to claim events of this type. Enter a host name or email. The system will show all available TTE users that match that requirement. Click "Choose" next to the correct host. A host can be removed by clicking "Remove". All hosts can be removed by clicking "Remove All".
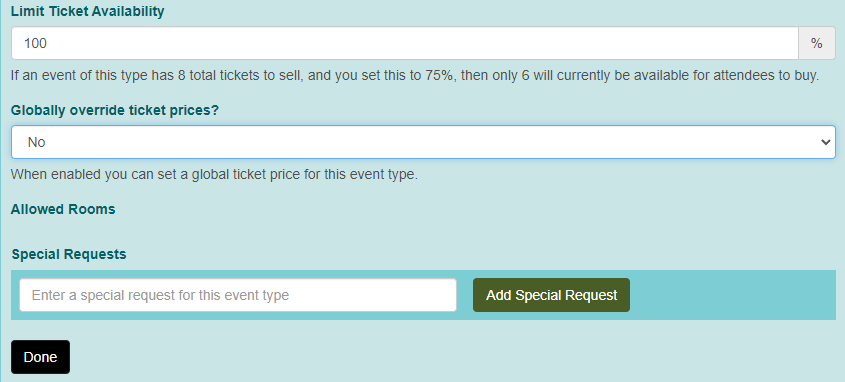
- Limit ticket availability?: If you plan to roll out availability for tickets for this type of event, you can set the current percentage of tickets that will be available in the system when event submissions opens.
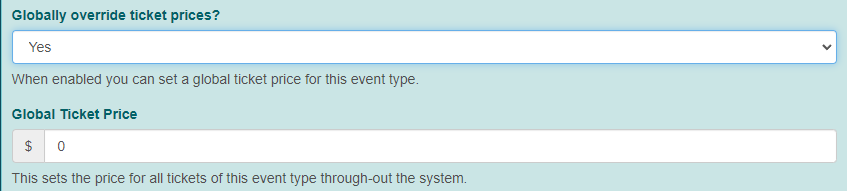
- Globally override ticket prices?: Will all tickets for this type of event have the same price? If you select yes the following field becomes available:
- Global Ticket Price: Set the price for all tickets of this event type.
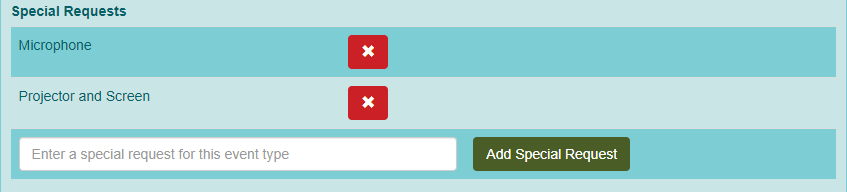
- Special Requests: Depending on the event type, you may have special requests available for your event types. Board games might have wifi, wheel chair access, quiet space, etc. while seminars might have power, wifi, projector, etc. Enter the request name and click "Add Special Request". Continue as needed.
- Click "Done" when you are finished.
- Repeat steps 4 - 6 for each event type. You can click "Copy" next to an event type to copy the event type setup. This allows you to change specific fields without having to create everything from scratch each time.
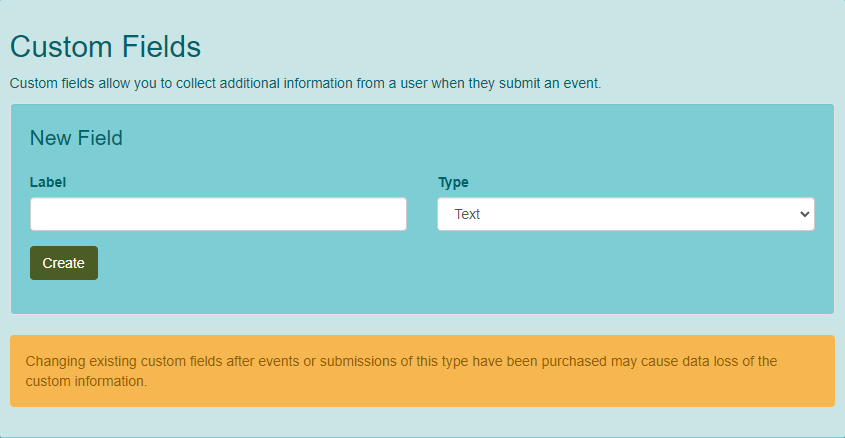
Custom Fields
- In the New Field section, enter a Label for the field and determine what Type of data will be entered into the field. Click "Create".
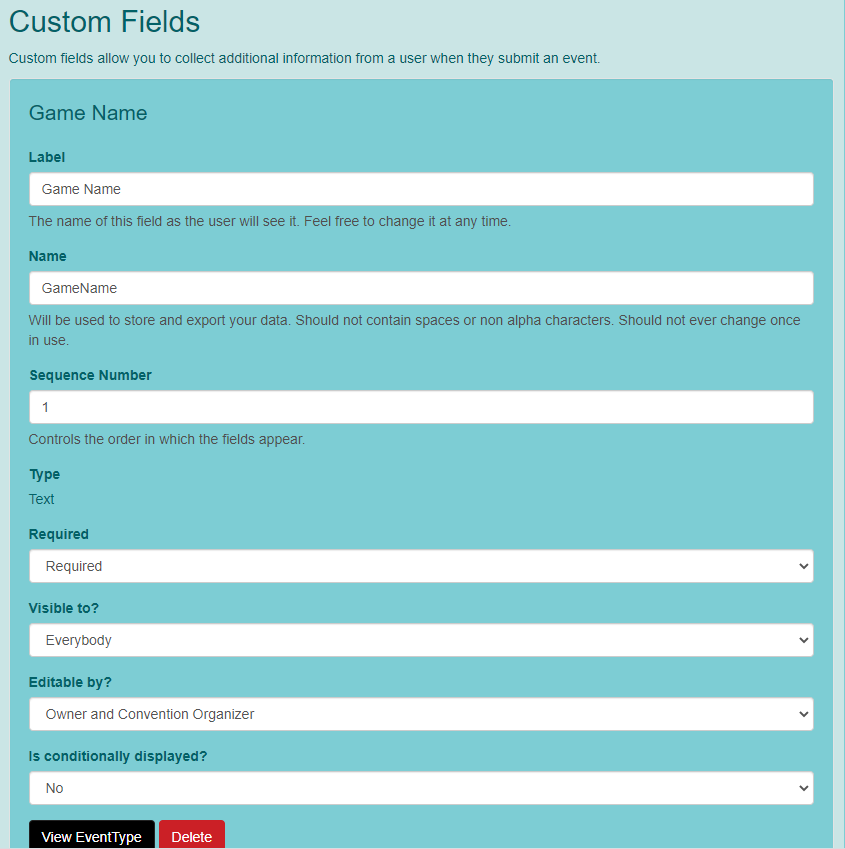
- Label: This is how the field will appear to the host when they are creating the event.
- Name: This is used by the database to store and export your data. This field should contain no spaces or non-alpha characters. Once this is set, it should never be changed.
- Sequence Number: If you have multiple custom fields, this will determine the order they appear to the host.
- Type: This is the type of data that will exist in this field. It cannot be changed once the custom field is created.
- Text: Contains letters, numbers and a limited set of punctuation characters. Maximum 255 characters.
- Long Text: Allows more characters in the data entry.
- Hyperlink: Allows a link to another web location.
- Dropdown List: Allows the organizer to define a list that the host will be forced to choose from. In the Drop Down List field, you will enter your list with one selectable option per row.
- Agree to Terms: Allows the organizer to have a link to a terms document. The host will have to check a box to agree.
- Required: Determine if the field is required or not for badge purchase.
- Visible to?: Owner and Convention Organizer allows the host and you to see the information in this field. Convention Organizers allows only you to see the information in this field.
- Editable by?: If you are allowing event submission editing, determine who can edit this field. Owner and Convention Organizer allows the host and you to edit. Convention Organizers allows only you to edit.
- Is conditionally displayed?: Determine if this field will only be displayed based on the contents of another field. If you select yes, you will be able to set the Conditional Field and Conditional Value.
- Repeat as needed. Click the "View Event Type" at the bottom of the custom field to return to the Edit Event Type screen. Click "Delete" to delete the custom field.
Import Event Types
- If you have created a previous convention and wish to import your event type categories from that convention, you first need to delete the default event types created by the system.
- Click on "Import" on the Event Types screen.
- This will display the Import Event Types screen.
- Choose a Convention to Import From in the drop-down menu.
- Click "Import Event Types from Convention".
- Event types will be imported.
Define Rooms and Spaces
Events will be scheduled into times slots in a specific space within a room (table in a convention ballroom). You will need to create a room for each convention ballroom or part of a ballroom you will be using. Within each room you will set all the spaces available.
- Click on Define Rooms and Spaces or go to Convention Tools > Scheduling > Rooms.
- This will display the Rooms screen.
- Type the name of a room and click "Create".
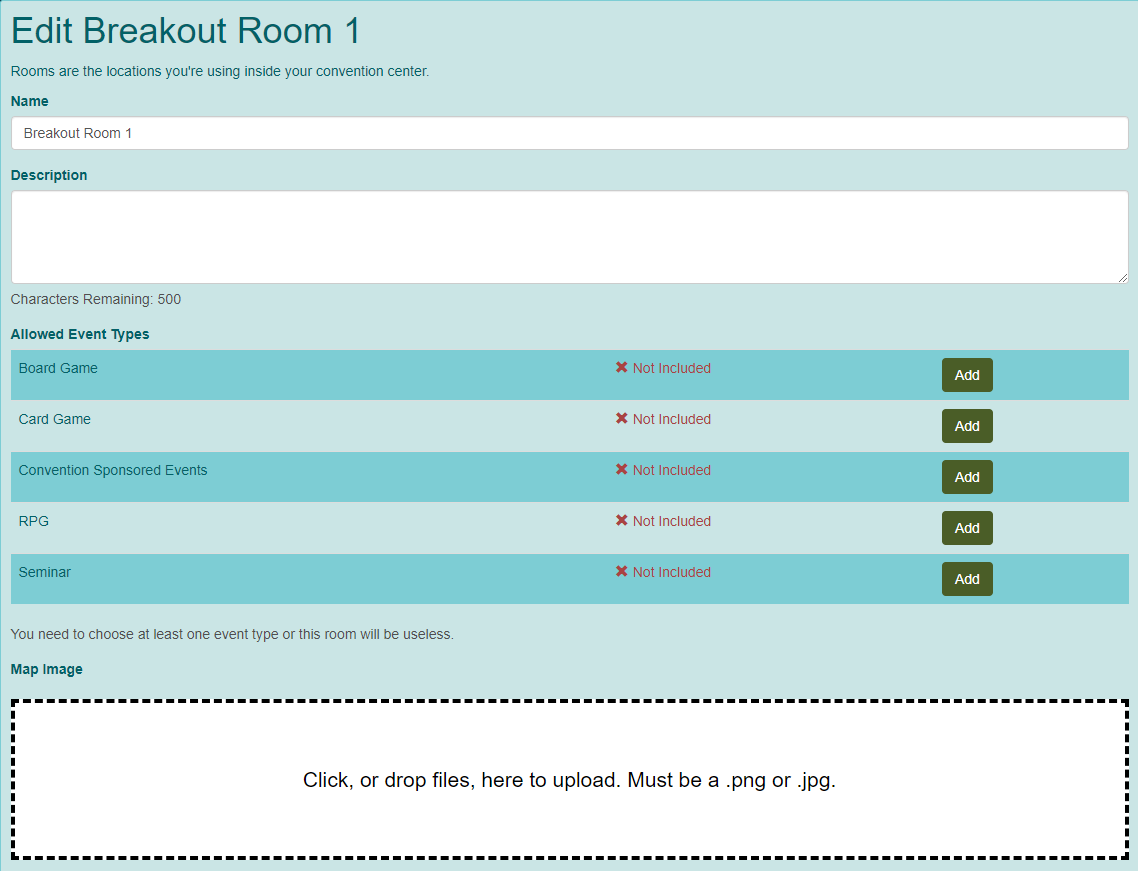
- This will display the Edit [room name] screen.
- Name: This is the room name you set upon creation.
- Description: This gives you 500 characters to give details about the room and how it is setup.
- Allowed Event Types: You can add any event types that can be held in this room.
- Map Image: If you have a map of the room layout or a picture from the venue that shows the room, you can upload that picture here.
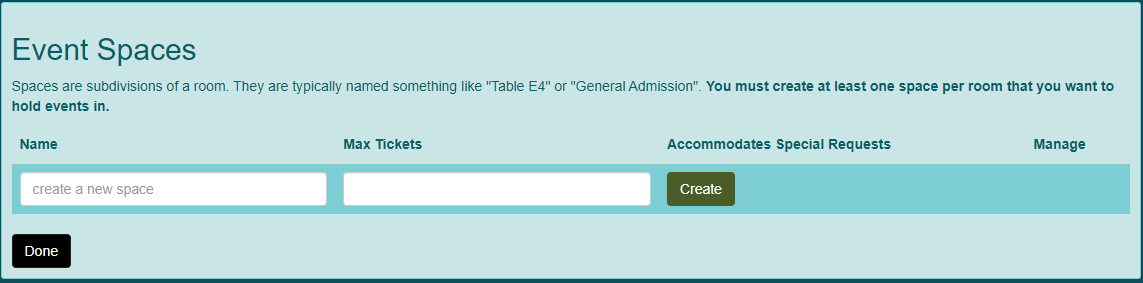
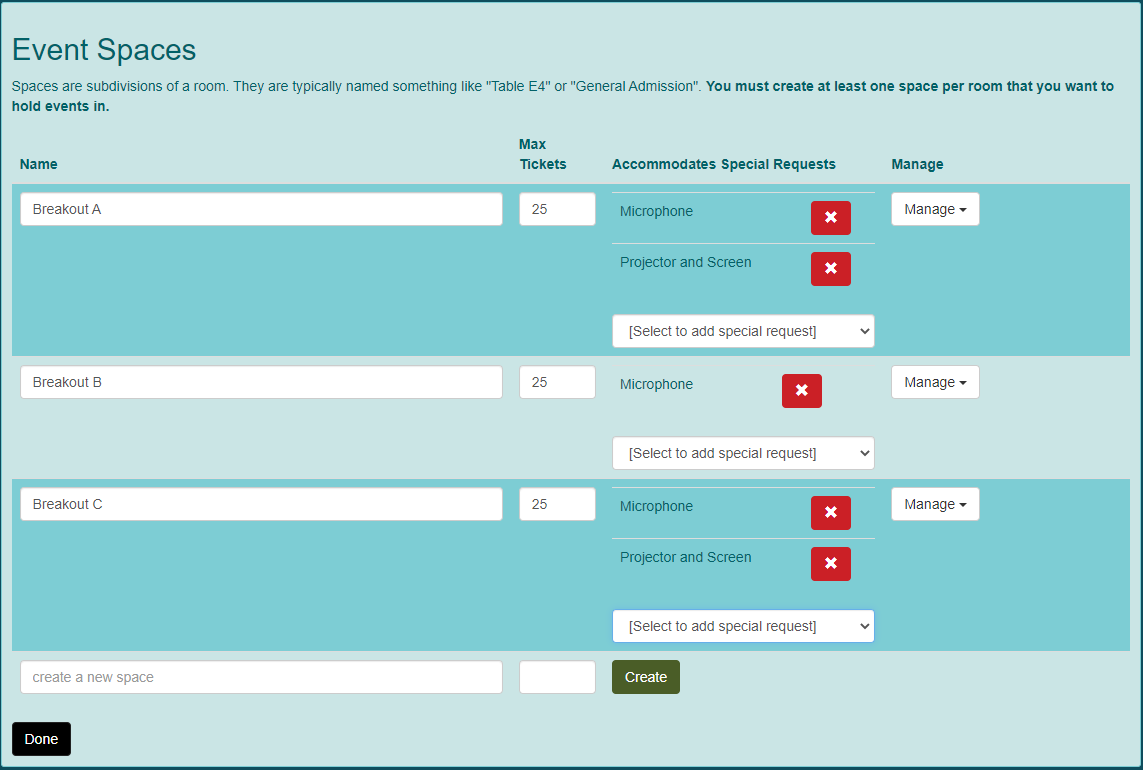
- In the Event Spaces section, you will now define the spaces (tables).
- Name: The name of the space (Table 1).
- Max Tickets: The maximum number of tickets this space can accommodate.
- Click "Create". If you have special requests configured for the event type allowed in this room, they will appear in the Accommodates Special Requests drop-down menu. Choose all that apply.
- Repeat as needed.
- Click "Done" when you have finished setting up that room and its spaces. Repeat as needed.

Import Rooms and Spaces
- If you have created a previous convention and wish to import your rooms and spaces from that convention, click on "Import" on the Rooms screen.
- This will display the Import Rooms screen.
- Choose a Convention to Import From in the drop-down menu.
- Click "Import Rooms from Convention".
- Rooms and spaces will be imported.
- You will have to "Edit" each room to choose Allowed Event Types for each.
Set Event Settings
- Click on Set Event Settings or go to Convention Tools > Scheduling > Settings.
- This will display the Schedule Settings screen.
- Event Submissions: The default for this field is pending. You can "Open Event Submission". Once event submissions have been opened, you have the choice to "Suspend Event Submission" or "Close Event Submission". If you close event submissions, you will not be able to reopen them.
- Require badge for event submissions?: If only registered attendees are allowed to submit event submissions, this should be set to yes. If you are allowing anyone to submit events and then optionally giving them a badge based on their hours hosting, this should be set to no.
- Allow waiting lists for events?: If you enable waiting lists for submissions, attendees can sign up for a waitlist events that no longer have tickets available. Wait lists are really just an email notification for the people who sign up. For more information see Purchase / Register Tickets for Conventions.
- Use event groups?: This allows you to further group your event types. More information can be found here.
- Allow event reservations?: This allows hosts the opportunity to reserve a spot for themselves at the event if they are playing or reserve tickets for TTE friends at the event. Options for this field include No Reservation of Event Seats Allowed, Event Submissions Can Reserve a Seat for Host, or Event Submissions Can Reserve Seats for Host and Attendees. If you turn on event reservations, the Suspend event registrations field will become visible. More information can be found here
- Event Submission Rules: The system creates a sample set of rules for hosts / GMs. You can edit this as needed. Hosts will have to agree to these rules when they submit events.
- Event attendees publicly visible?: Determines whether or not the attendee list is visible on the event schedule.
- Maximum Event Description Length: Sets the number of characters available for hosts to describe the event.
- Maximum Event Submissions Per User: Sets the maximum number of events one host is allowed to submit.
- Event Submission Deadline: Allows a date to be set to automatically switch event submissions to suspended.
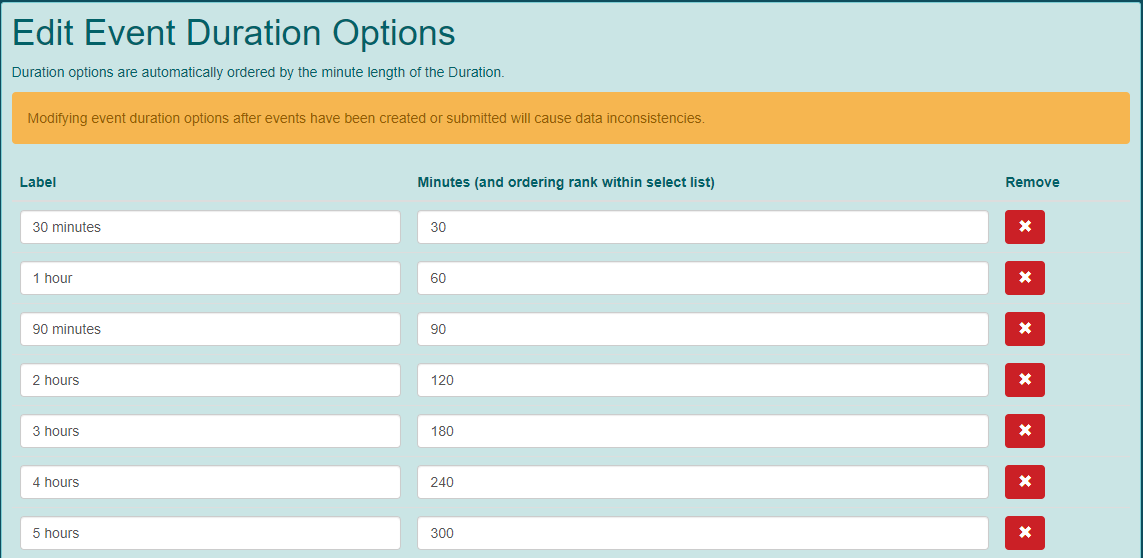
- Define Convention Event Duration Options: You can click "View Event Duration Options". This will allow you to customize the durations hosts can choose from when creating an event submission. You can edit the system generated durations, add new durations or remove existing durations. Click "Done" when you are finished.
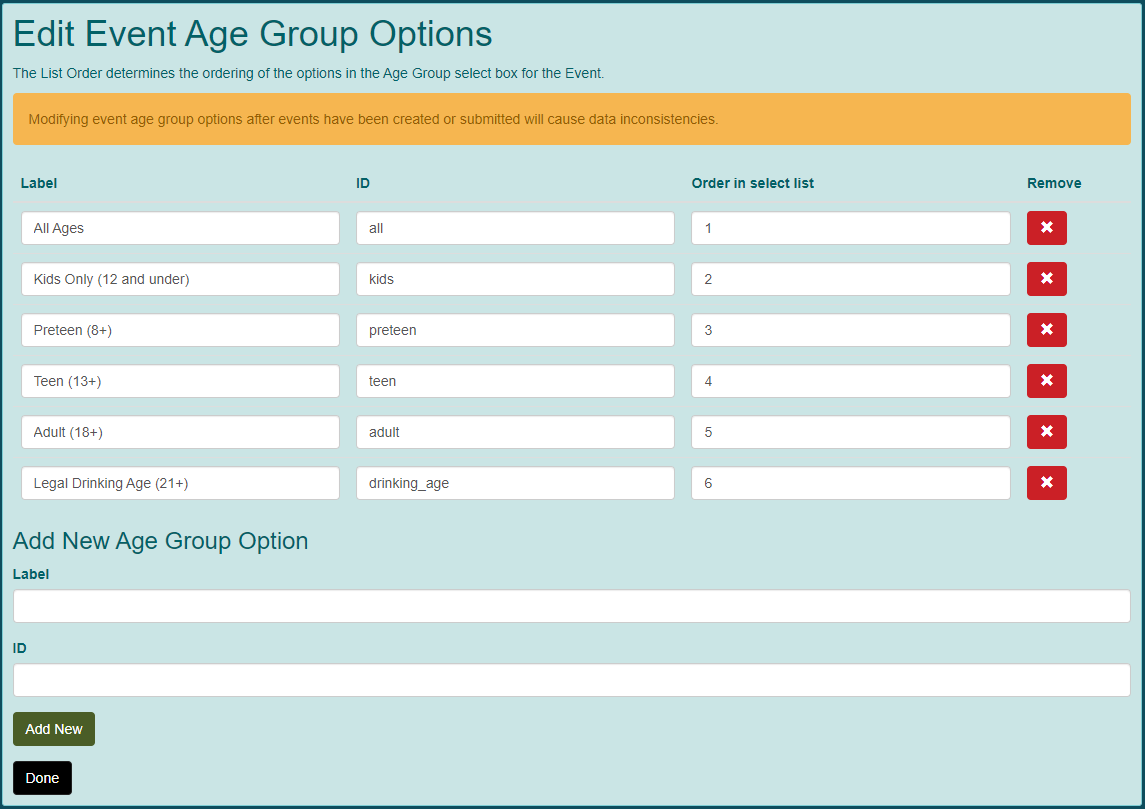
- Define Convention Event Age Group Options: You can click "View Event Age Duration Options". This will allow you to customize the age groups hosts can choose from when creating an event submission. You can edit the system generated age groups, add new age groups or remove age groups. Click "Done" when you are finished.
- Integrate with Discord? Virtual conventions may choose to integrate their events with a Discord server. Directions for this can be found in here.


Setting Specific Start Times
Typically, TTE will show all available Day Parts to attendees as possible start times for events. As a convention organizer, you are able to limit the visible start times to enforce all events starting at the same time.
- Go to Convention Settings > Convention Setup > Dates.
- Choose Edit from the Manage drop-down menu.
- Under the Day Parts section, click the "X" in the Hidden? column for each day part you wish to hide as start times from the hosts.
Open Event Submission
When you have you event types, rooms and spaces configured, you can open event submissions.
- If you are following the checklist step-by-step, you are already on the Scheduling Settings screen. If you are returning, click on Open Event Submission from the checklist or go to Convention Tools > Scheduling > Settings.
- This will display the Scheduling Settings screen.
- Under Event Submissions, click "Open Event Submissions."
- Event submissions are now open. You can Suspend Event Submission or Close Event Submission, but remember that once closed, they cannot be reopened.
General Ticket Settings
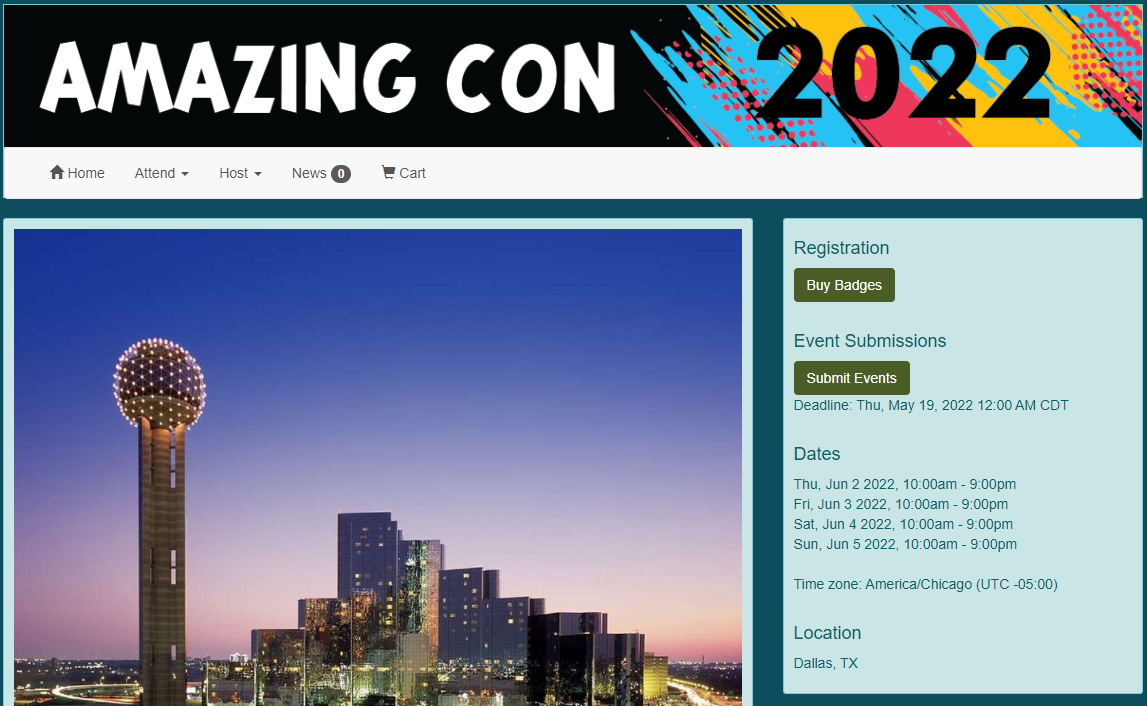
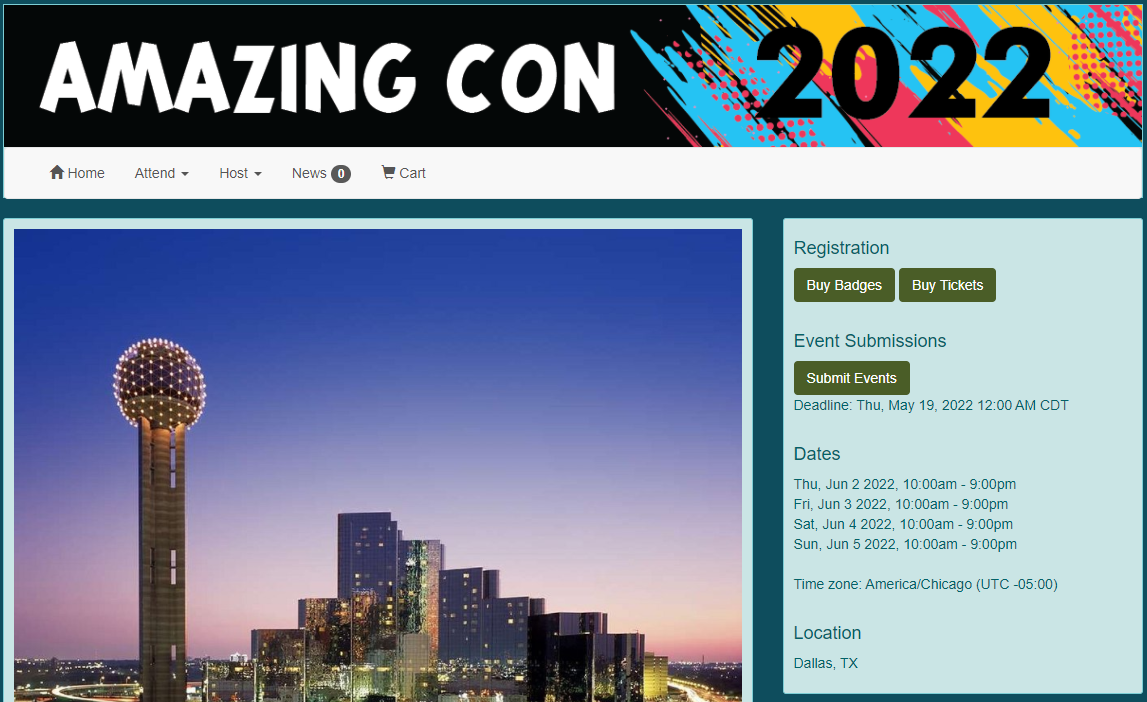
Tickets are the way your attendees add events to their schedule. The events schedule will have "Get" or "Buy" to the left of the event name when tickets are available. "Buy" indicates tickets available to purchase, and "Get" indicates tickets available for free. Purchase / Register Tickets for Convention.
- Click on General Ticket Settings from the checklist or go to Convention Tools > Registration > Settings.
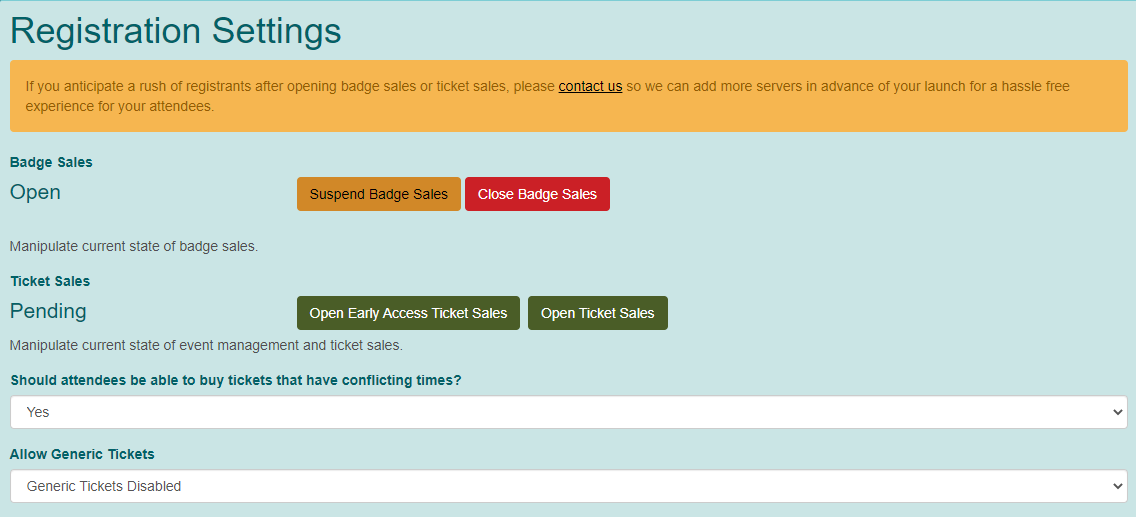
- This will display the Registration Settings screen.
- Ticket Sales: The default for this field is pending. You can "Open Early Access Ticket Sales" or "Open Ticket Sales". Once ticket sales have been opened, you have the choice to "Suspend Ticket Sales" or "Close Ticket Sales". If you close sales, you will not be able to reopen them. "Open Early Access Ticket Sales" will open sales only to badge types that have the Early Access for Tickets? field set to Yes in the Edit Badge Type "[badge type]" screen.
- Should attendees be able to buy tickets that have conflicting times?: This allows you to block attendees from being able to double book themselves for events. Hosts are not blocked from buying tickets that conflict with the events they are hosting.
- Allow Generic Tickets: Generic tickets can be offered at a set cost per time slot. When you enable this feature, the Generic Ticket Price field is visible which lets you set a price for all generic tickets. For information on how attendees can purchase and use these badges, see Purchase / Register Ticket for Convention Event.
- Tickets Per Event Per Badge: Allows you to set a maximum number of tickets that a badge is able to purchase.
- Use E-Tickets?: If you'd like to go paperless, your convention can allow E-Tickets. An attendee's e-tickets will be available through Attend > My E-Tickets on your convention home page. If you enable this feature, Allow tap to collect E-Tickets? allows you to choose if an event host can "collect" a ticket by tapping on the E-Ticket on an attendee's smart phone.
- Click "Done" when finished.

Setup Discount Codes (optional)
Discount codes are available for badges. You might want to set up an early bird discount or use them to comp your staff badges. Refer to Activate / Manage Discount Codes for additional information.
Open Ticket Sales
- If you are following the checklist step-by-step, you are already on the Registration Settings screen. If you are returning, click on Open Ticket Sales in the checklist or go to Convention Tools > Registration > Settings.
- This will display the Registration Settings screen.
- Click on "Open Early Access Ticket Sales" or "Open Ticket Sales".
- Ticket sales are now open. You can Suspend Ticket Sales or Close Ticket Sales, but remember that once closed, they cannot be reopened.
Event Groups
To setup event groups, you must have the Use event groups? field in Convention Tools > Scheduling Settings set to Yes. Event Groups are a way to categorize your events beyond the standard things like time, type, and location. It allows you to create arbitrary groupings of events, which can then be used by attendees in searching for events, or by event organizers to limit access to some types of events.
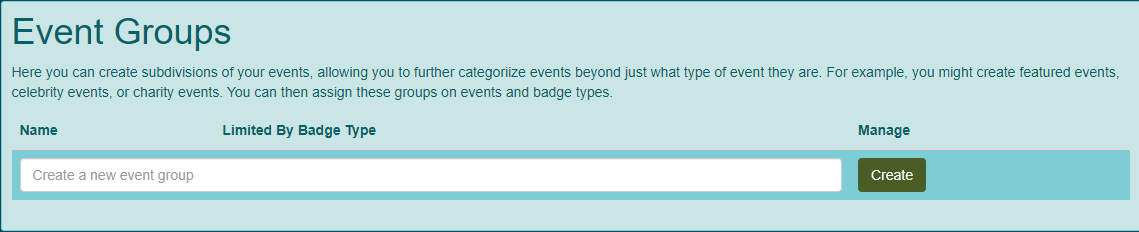
- Go to Convention Tools > Scheduling > Event Groups.
- This will display the Event Groups screen.
- Enter a Name then click "Create".
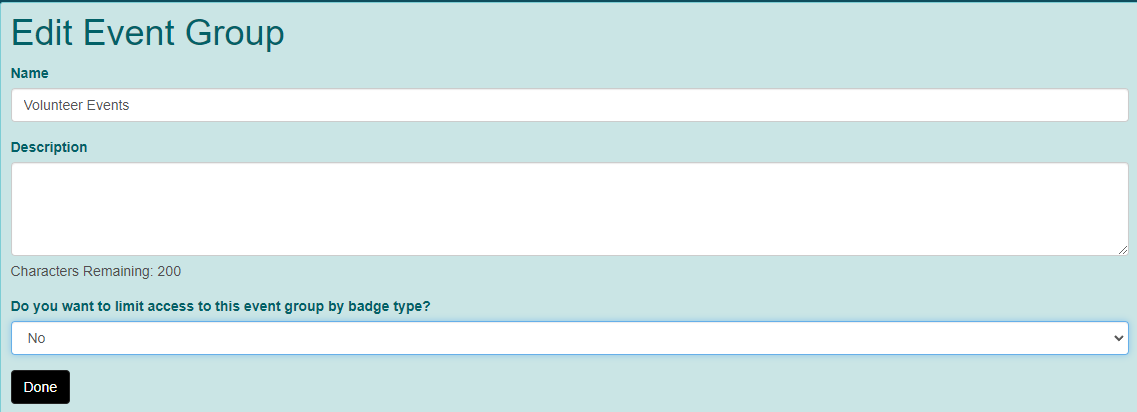
- This will display the Edit Event Group screen.
- Name: The name you specified when you created the event group.
- Description: A brief description of the purpose of the event group.
- Do you want to limit access to this event group by badge type?: Allows you to specify that only certain badge types are able to access events in this event group. If you set this to yes, the Badge Types section is displayed.
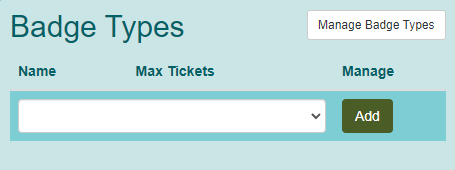
- Choose a badge type from the drop-down menu and click "Add". Repeat as necessary. When you select a badge type for this event group, additional fields are available for the Edit Badge Type "[badge type]" screen. Click "Manage Badge Types" to reach the Get Your Badge screen. Click "Edit" next to the badge type you have assigned to the event group. The following new fields are available:
- For each event type you can determine the Max Tickets Per Badge that are allowed to be purchased. Click "Manage Event Groups" to return to the Event Groups screen.

Return to Set Event Settings
Event Reservations
Event reservations can include a seat for the host at the table or a seat for the host and reserved tickets for their TTE friends.
Hosts Only
To setup event reservations for hosts, you must have the Allow event reservations? field in Convention Tools > Scheduling > Settings set to Event Submissions Can Reserve a Seat for Host. A single host can reserve a spot at the space (table) for their event. A host reservation will allow the host to set the maximum tickets to the actual number of seats needed at the space (table). The reservation will then subtract a spot for the host from the number of tickets available during ticket sales. For example, if a host is scheduling a 5 player game and wishes to have a reserved place for himself:
- Max tickets: 5
- Will event host also play the game?: Yes
- Auto-schedule will schedule this game to a space with 5 seats.
- Only 4 tickets will be available for sale.
If the host is only doing a rules explanation and does NOT need a seat at the table,
- Max tickets: 5
- Will event host also play the game: No
- Auto-schedule will schedule this game to a space with 5 seats.
- 5 tickets will be available for sale.
Hosts and Attendees
To setup reservations for hosts, you must have the Allow event reservations? field in Convention Tools > Scheduling > Settings set to Event Submissions Can Reserve Seats for Host and Attendees. Not only will the host be able to reserve a seat for themselves, they will also be able to reserve event tickets for individuals from their TTE friends' list. For example, if a host is scheduling a 5 player game and wishes to reserve the entire event as a private event:
- Max tickets: 5
- Will event host also play the game?: Yes
- Reserved Tickets for Attendees: 4
- Host will select 4 TTE users from their friends list.
- Auto-schedule will schedule this game to a space with 5 seats.
- The event will show in the schedule without the ability to buy or get tickets.
If the host is only reserving a two seats for specific players:
- Max tickets: 5
- Will event host also play the game?: Yes
- Reserved Tickets for Attendees: 2
- Host will select 2 TTE users from their friends list.
- Auto-schedule will schedule this game to a space with 5 seats.
- The event will show in the schedule with the ability to buy or get 2 tickets.
Return to Set Event Settings
Tutorials
Warning! Tutorials may be slightly out of date with current code.