
Activate Volunteers Module
Volunteer configuration is in the Volunteer module. After you have completed creating your convention, you can activate this module and configure volunteer shifts and the application to get ready for recruiting volunteers to your show. The Volunteer module can be configured when a convention is public or private.
- Activate Volunteer Module
- Enable Volunteer Management
- Set Volunteer Settings
- Define Shift Types
- Create Shifts
- Open Volunteering
- Import Shift Types and Shifts
- Tutorials
Activate Volunteer Module
The Activate Volunteer Module Checklist is located to the right of the Getting Started Checklist. Expand the checklist for step-by-step instructions on volunteer setup.
Enable Volunteer Management
- Click on Enable Volunteer Management or go to Convention Tools > Volunteers > Settings.
- This will display the Volunteer Settings screen.
- Click the "Enable Volunteering" button under Volunteer Management.

Set Volunteer Settings
- Click on Set Volunteer Settings in the checklist or go to Convention Tools > Volunteers > Settings.
- This will display the Volunteer Settings screen.
- Badge Required for Volunteers: If only registered attendees are allowed to apply to volunteer, this should be set to either Badge required; volunteer for any shift or Badge required; volunteer for shift on day of badge. If you are allowing anyone to apply to volunteer and then optionally giving them a badge or badge discount based on their hours volunteering, this should be set to No badge required to volunteer. Note: If you set this to Badge required; volunteer for shift on day of badge, you will not be allowed to have volunteers apply for shifts during Setup days since their badge only covers Event days.
- Include a Custom Greeting in the Scheduled Volunteer Email: When you schedule a volunteer for a shift, they will receive a system generated confirmation email. If you'd like to add a customized portion to that email, that can be entered here. Type your message into Scheduled Volunteer Greeting and you will see a preview on the right side of the page.

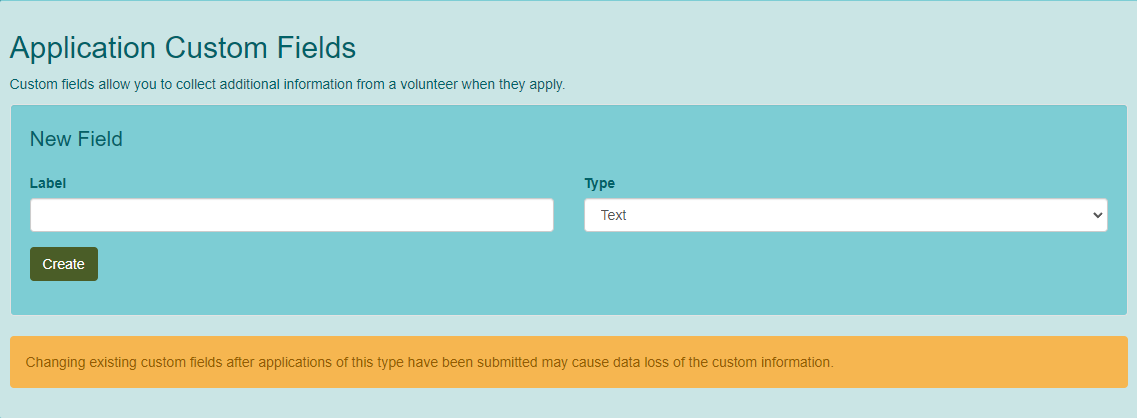
Application Custom Fields
- In the New Field section, enter a Label for the field and determine what Type of data will be entered into the field. Click "Create".
- Label: This is how the field will appear to the attendee when they are purchasing the badge.
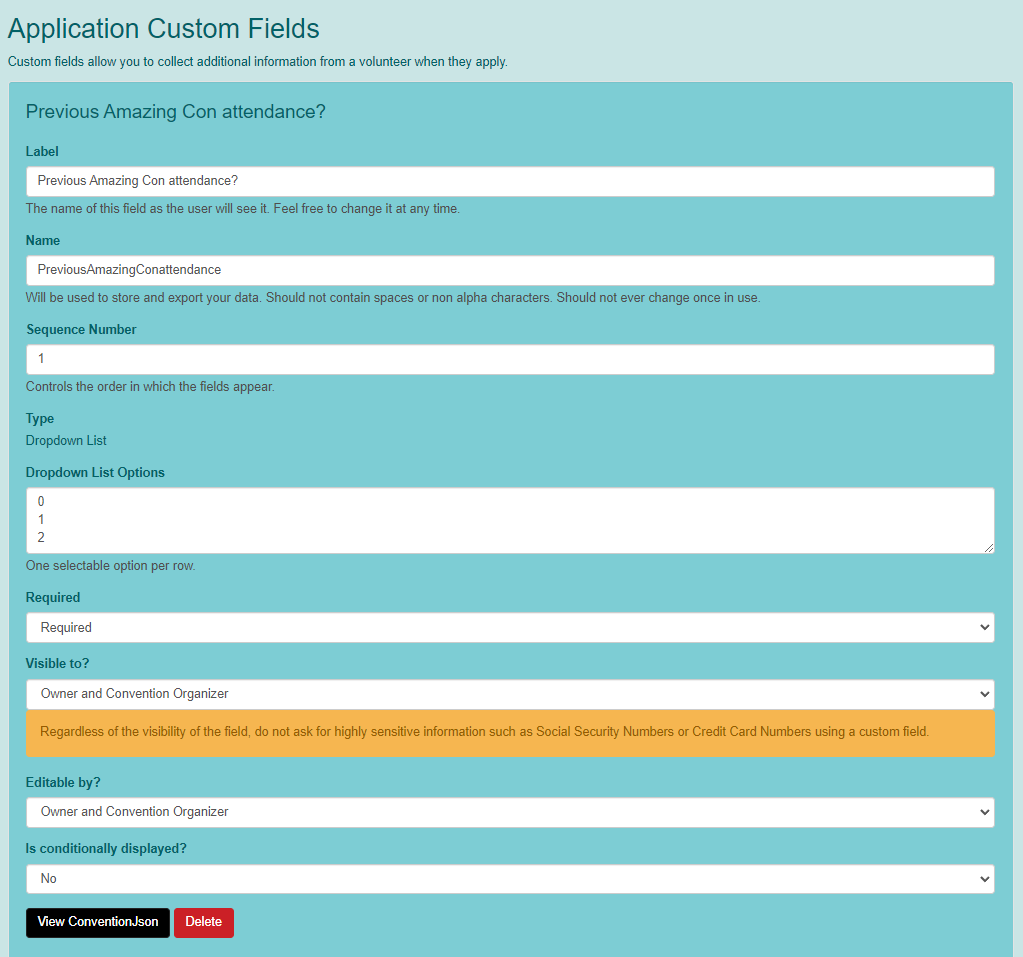
- Name: This is used by the database to store and export your data. This field should contain no spaces or non-alpha characters. Once this is set, it should never be changed.
- Sequence Number: If you have multiple custom fields, this will determine the order they appear to the attendee.
- Type: This is the type of data that will exist in this field. It cannot be changed once the custom field is created.
- Text: Contains letters, numbers and a limited set of punctuation characters. Maximum 255 characters.
- Long Text: Allows more characters in the data entry.
- Hyperlink: Allows a link to another web location.
- Dropdown List: Allows the organizer to define a list that the attendee will be forced to choose from. In the Drop Down List field, you will enter your list with one selectable option per row.
- Agree to Terms: Allows the organizer to have a link to a terms document. The attendee will have to check a box to agree.
- Required: Determine if the field is required or not for volunteer application.
- Visible to?: Everybody - allows all attendees to see the information in this field. Owner and Convention Organizer - allows the badge holder and you to see the information in this field. Convention Organizers - allows only you to see the information in this field.
- Editable by?: If you are allowing badge editing, determine who can edit this field. Owner and Convention Organizer allows the applicant and you to edit. Convention Organizers allows only you to edit.
- Is conditionally displayed?: Determine if this field will only be displayed based on the contents of another field. If you select yes, you will be able to set the Conditional Field and Conditional Value.
- Repeat as needed.
- Click "Done" when you are finished.
Define Shift Types
Shift types help to group your shifts in the volunteer module. These can be imported from another convention. Go here for additional instructions.
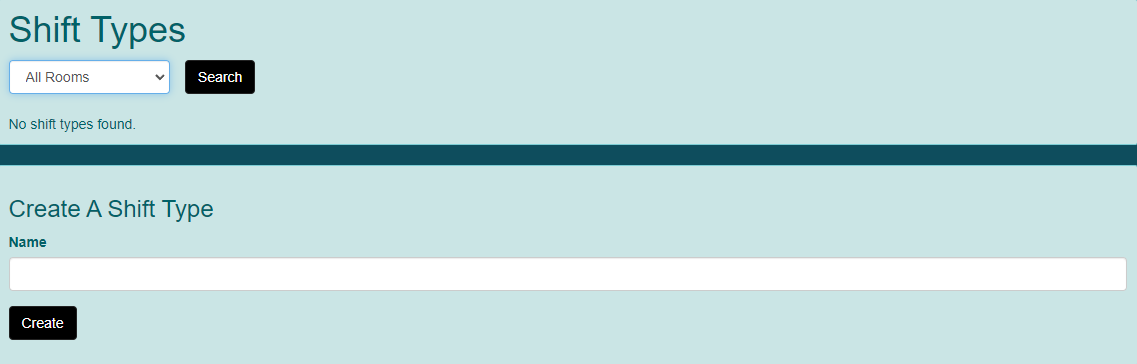
- Click on Define Shift Types from the checklist or go to Convention Tools > Volunteers > Shift Types.
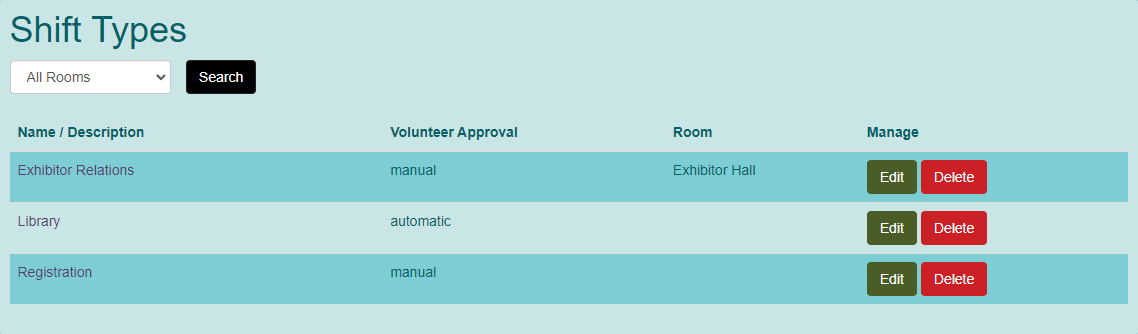
- This will display the Shift Types screen.
- In the Create A Shift Type section, type a Name and click "Create".
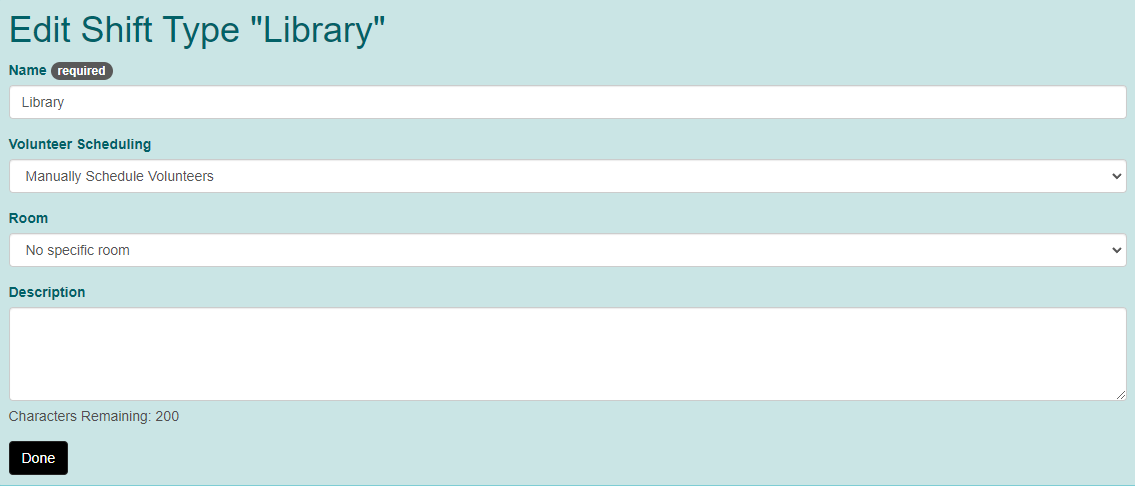
- The Edit Shift Type "[shift type name]" screen will display.
- Name: This is the information you provided upon creation.
- Volunteer Scheduling: You can choose to manually schedule volunteers or automatically schedule volunteers. Manual scheduling will require you to review each application and schedule the shifts for that attendee. Until you schedule them, the volunteer can edit their shifts and the shifts will still show as needed on the convention site. Automatically scheduling will place them into the schedule immediately. The volunteer will not be able to change their shifts, but the shift are immediately deducted from those needed on the convention site.
- Room: If you have a room created where this type of shift will occur, you can select it from the drop down box.
- Description: You can provide additional information regarding what will be required for this type of shift.
- Click "Done" when you are finished.
- Repeat steps as needed.
Create Shifts
You will need shifts for each volunteer shift you are offering at your convention. These can be imported from another convention. Go here for additional instructions.
- Click on Create Shifts from the checklist or go to Convention Tools > Volunteers > Shifts.
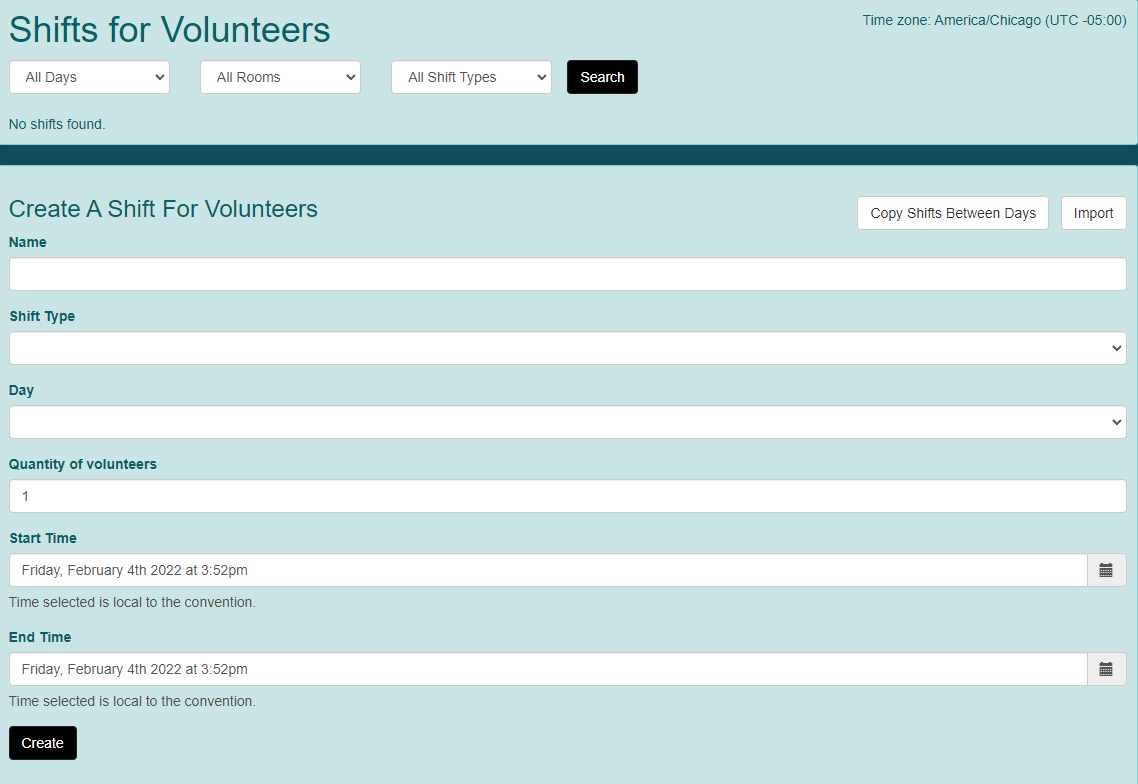
- This will display the Shifts for Volunteers screen.
- Name: What is the name of the shift? This typically is some combination of the type, day and time.
- Shift Type: What is the type of shift being created?
- Day: What convention day will this shift be required?
- Quantity of volunteers: How many of this shift should be available?
- Start Time: What is the start time of the shift? This cannot be before the convention day begins.
- End Time: What is the end time of this shift? This cannot be after the convention day ends.
- Click "Create" when finished.
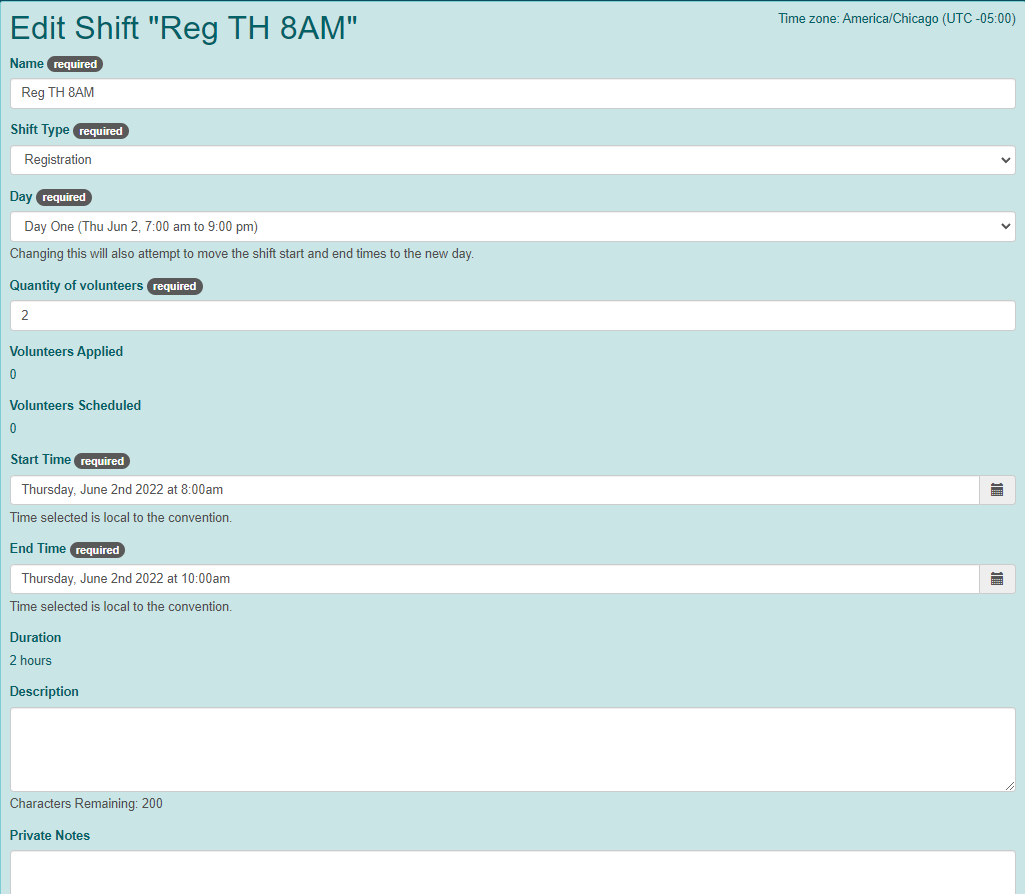
- This will display the Edit Shift "[shift name]" screen.
- You can add a Description of the shift or Private Notes.
- Click "Done" when finished.
- This will take you back to the Shifts for Volunteers screen.
- Repeat steps 2 - 7 as necessary.
Copy (same day)
To save time, you may want to copy a shift you just created to create additional shifts on the same day.
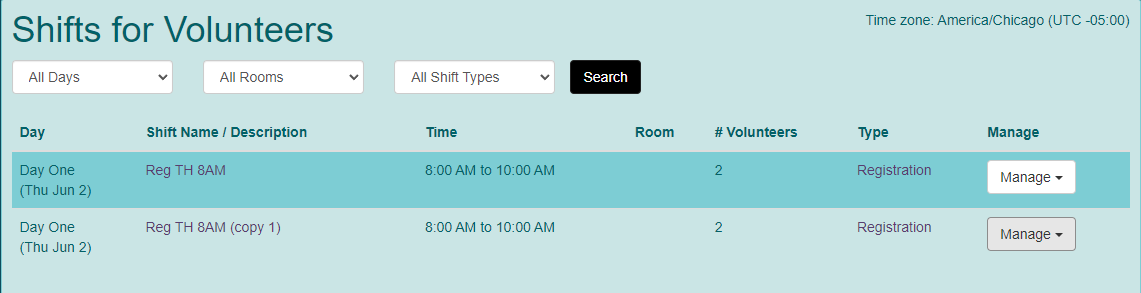
- Click "Manage" next to the shift you wish to copy.
- Choose Copy (same day).
- A copy of the shift will appear.
- Click "Manage" and choose Edit to change the shift information.
- Click "Done" when finished.
- Repeat as necessary.
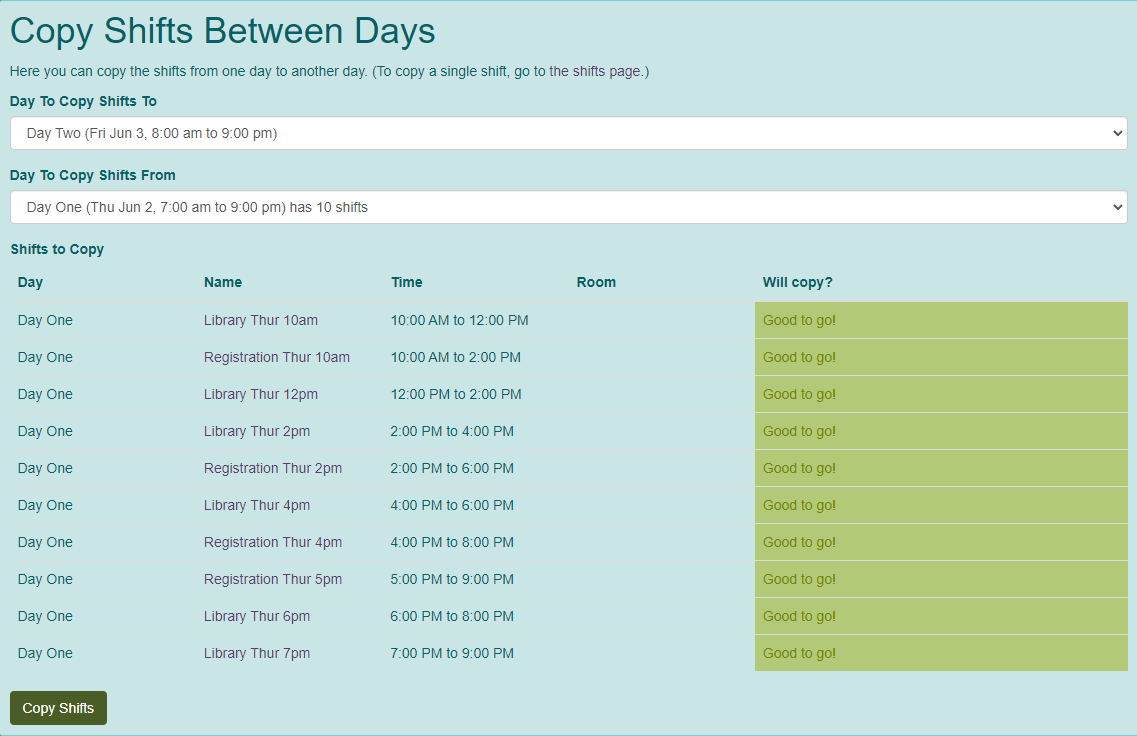
Copy Shifts Between Days
After you have created an entire day of shifts, you may find it is easier to copy this entire day to the following days of your convention.
- Click the "Copy Shifts Between Days" at the top of the Create A Shift For Volunteers section.
- The Copy Shifts Between Days screen will be displayed.
- In the Days to Copy Shifts To field, choose the day of shifts you are creating.
- The Days to Copy Shifts From field will appear. Choose the day for which you have just completed shift creation.
- The system will display all the shifts that are to be copied.
- Click "Copy Shifts" when ready.
- Click "Manage" and choose edit to update the shift information.
- Click "Done" when finished.
- Repeat as necessary.


Open Volunteering
- Click on Open Volunteering from the checklist or go to Convention Tools > Volunteers > Settings.
- This will display the Volunteer Settings screen.
- Under Volunteer Management, click the "Open Volunteering" button.
- Volunteering is now open. You can Suspend Volunteering or Close Volunteering, but remember that once closed, they cannot be reopened.

Import Shift Types and Shifts
- If you have created a previous convention and wish to import your shift types and shifts from that convention, go to Convention Tools > Volunteers > Shifts.
- Click on "Import' in the Create A Shift For Volunteers section.
- This will display the Import Shifts From Another Convention screen.
- Choose a Convention To Import From in the drop-down menu.
- Click "Import Shift Types From Convention".
- Shift types and shifts will be imported.
Return to Shift Types
Return to Shifts
Tutorials
Warning! Tutorials may be slightly out of date with current code.