Purchase / Register Tickets for Convention Event
You must have a Tabletop.Events (TTE) account in order to purchase badges, tickets, merch, etc. You can find instructions on Creating an Account here.
Once you have purchased a badge (or have one in your cart) you may purchase tickets for individual events:
If you are interested in an event, you can sign up for the wait list.You can also claim a reserved ticket.
Then you checkout your cart.
After you purchase a ticket, you can always review the tickets assigned to your badge.
If an event does not have a host, you can volunteer.
You can also send messages to event hosts once you have purchased tickets.
Adding Ticket(s) to Your Cart
For Yourself or Friends Under Your TTE Account
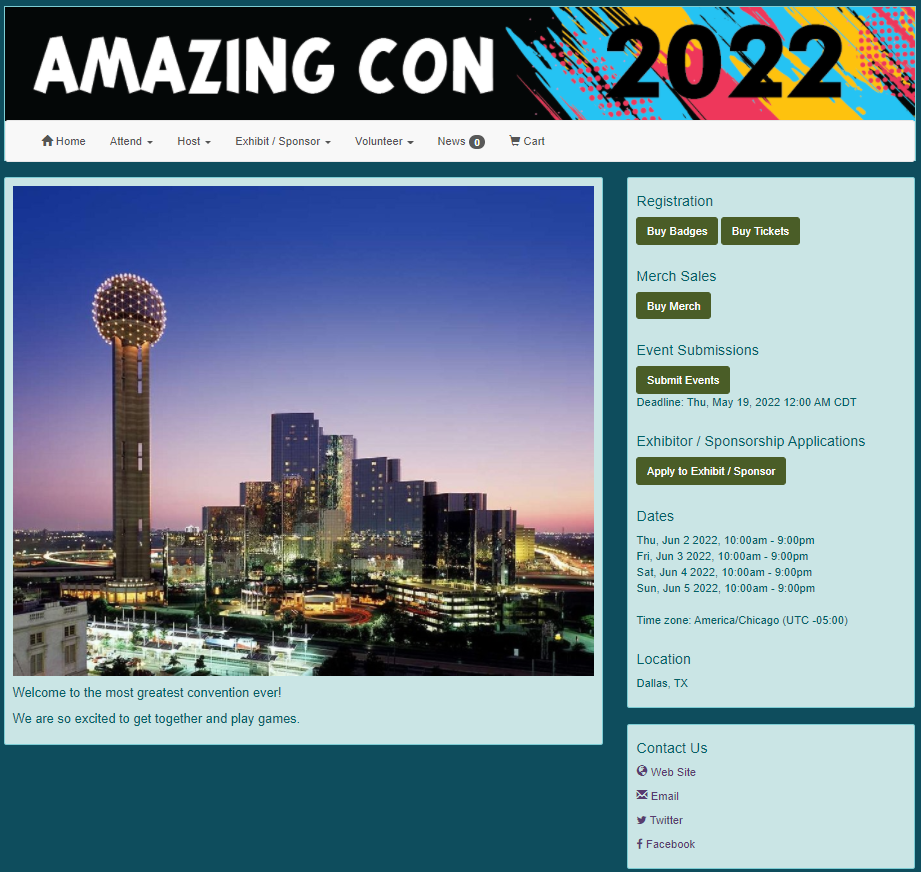
- Go to the home page of the convention you are attending.
- You can either click the "Buy Tickets" button in the Registration section OR go to Attend > Events Schedule. Both will take you to the Schedule of Events page.
- You can use the filters at the top and bottom of the page to narrow down the list of events you see. If you click on the check mark next to the event name, that will like the event which allows you to filter for just "liked" events. You can use the various buttons at the bottom of the page to choose which columns are visible in the schedule. You can also download a copy of the schedule in a CSV format. However, this file is only generated each night, so you will not get the most recent changes made to the event schedule in that format.
- Events which have available tickets will have either a "Get" or "Buy" button to the left. "Buy" indicates tickets available for a cost, and "Get" indicates tickets available for free. Tickets without a button to the left indicates non-ticketed events that are view only on the schedule.
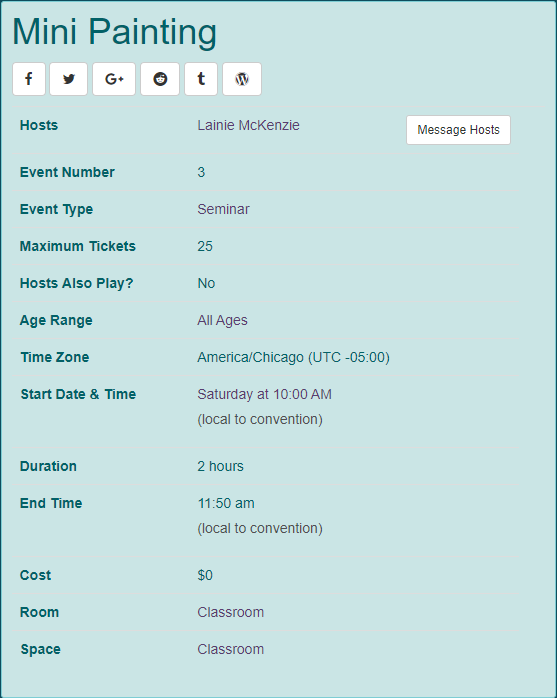
- When you click one of the buttons or the event number or name, you are taken to the Event page.
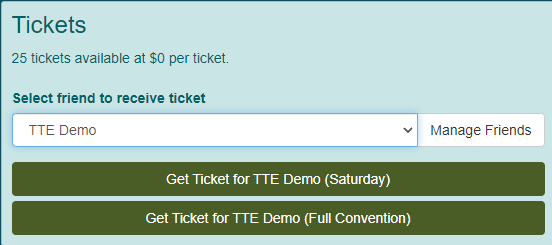
- The full event description appears on the left. In the Tickets section, you choose which badge associated should be assigned the ticket. If you have a Discount Code, you must enter it here.
- The ticket appears in the Cart section. If you wish to purchase additional tickets, you click the "Buy More Tickets" button. Continue this process until you are ready to check out.
- You must complete the checkout process even for free tickets.


Generic Tickets
Some conventions utilize generic tickets. You can purchase generic tickets for yourself or any badge assigned to you TTE account. From the convention home page, go to Attend > Buy Generic Tickets. Add tickets to your cart as described above.
For a Friend on Your Friend List
- From the Event page, in the Tickets section, click the "Give to a friend?" button.
- Choose a friend from the list. Their available badges should be displayed. Choose the badge you wish to assign the ticket. You will receive a system notification.
- Click "OK".
- The ticket appears in the Cart section. If you wish to purchase additional tickets, you click the "Buy More Tickets" button. Continue this process until you are ready to check out.
- You must complete the checkout process even for free tickets.
Waitlist for Sold Out Events
- If you are interested in a sold-out event, you can click on the event name.
- At the bottom of the page, add click the "Notify Me" button to be added to the waiting list. When a ticket becomes available, an email is sent to everyone on the list alerting them a ticket has become available. All attendees on the waitlist will receive the email at the same time. Available tickets are first-come, first-serve.

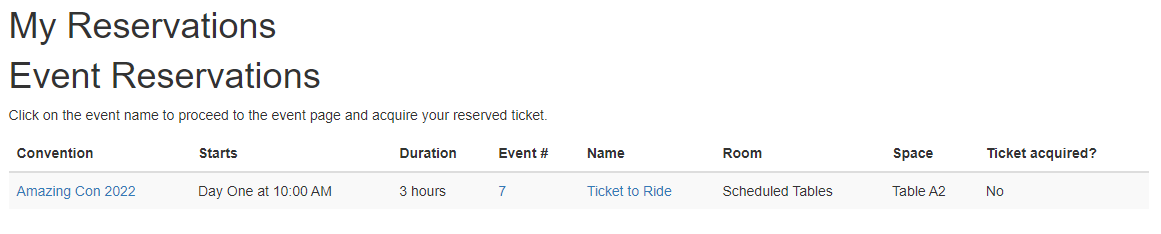
Claim a Reserved Ticket
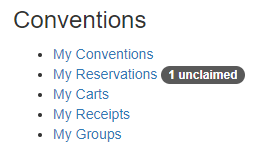
- If you have been invited to an event by one of your TTE friends, you will receive an email notification. You can also access reservations by clicking on your username, and then clicking on My Reservations on the right side of the page under Conventions.
- All pending event reservations will show on the My Reservations screen.
- Click on the Event # or Name.
- The Event page will appear.
- Proceed to add tickets to your cart as outlined above.
Checking Out
Once a ticket has been added to your cart, it is yours. However, if you don't check out within 2 hours, all tickets will be released for others to purchase.
- You must complete the checkout process even for free tickets.
- Click the "Checkout" button in the Cart section.
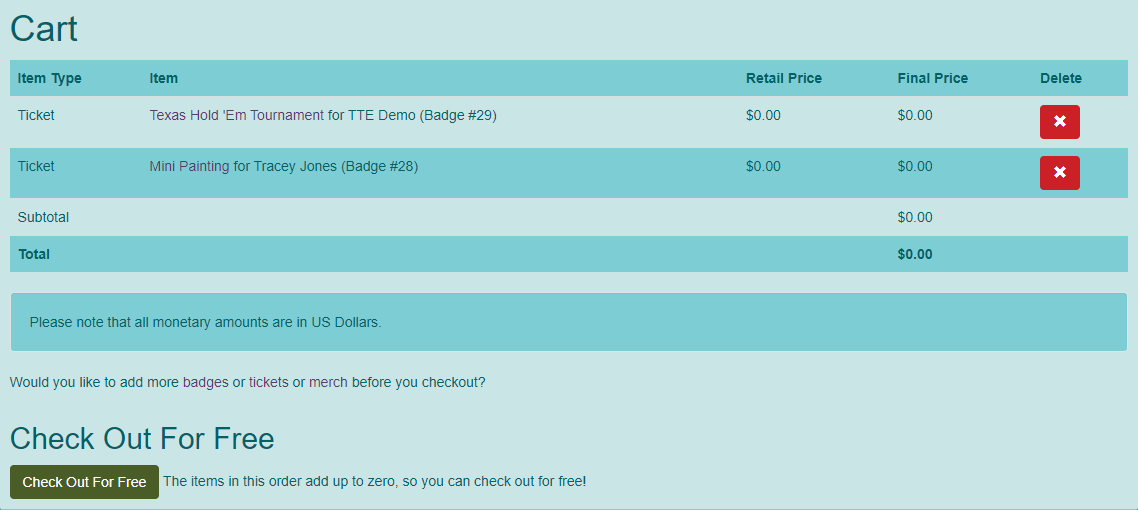
Check Out For Free
- If the tickets you have chosen were free, you will see the Check Out For Free section.
- Click the "Check Out For Free" button.
- After you have completed checkout, you will receive a receipt for the transaction.
Pay by Credit Card
- If you have tickets which have an associated cost, you will see the Pay by Credit Card section.
- When checking out, you can choose "Guest Checkout" to use a credit card and not save it to your TTE profile. Enter your card information and click "Verify Card". Once the card is verified, you must click "Pay via Credit Card" to complete the transaction or "Clear Card" to enter another card. If you wish to save the card to your profile for faster checkout during later purchases, skip to step 3.
- To add a card to your TTE profile, click the "Add a Card to Profile" button in the Pay by Credit Card section. Complete all the fields and click "Save Card". If you have a card saved to your TTE account, skip to step 4.
- To load a saved card, click the drop-down and choose the appropriate Credit Card and enter the Zip Code associated with the card. Click "Pay via Credit Card".
- After you have completed checkout, you will receive see a receipt for the transaction. A copy will be sent to your e-mail.
- You can cancel tickets by clicking on the "Refund" button for tickets with a cost or the "Delete" button for tickets that are free.
For a Friend on Your Friend List
When you checkout with a ticket that was purchased for someone on your Friend list, an email titled "Your friend [your name] gifted a ticket to your Tabletop.Events account" will be sent to them from info@tabletop.events. They can also see the tickets from the convention home page under the Conventions I'm Attending section of TTE.
Reviewing Your Tickets
- If you wish to review your tickets after purchase, click on your username in the upper right hand corner of the screen.
- In the Conventions I'm Attending section, click on the badge you wish to review.
- You can also view your tickets by going to the homepage of the convention, choosing Attend > Get / View Your Badge and clicking on the badge you wish to review.
- Tickets associated with the badge are listed towards the bottom.
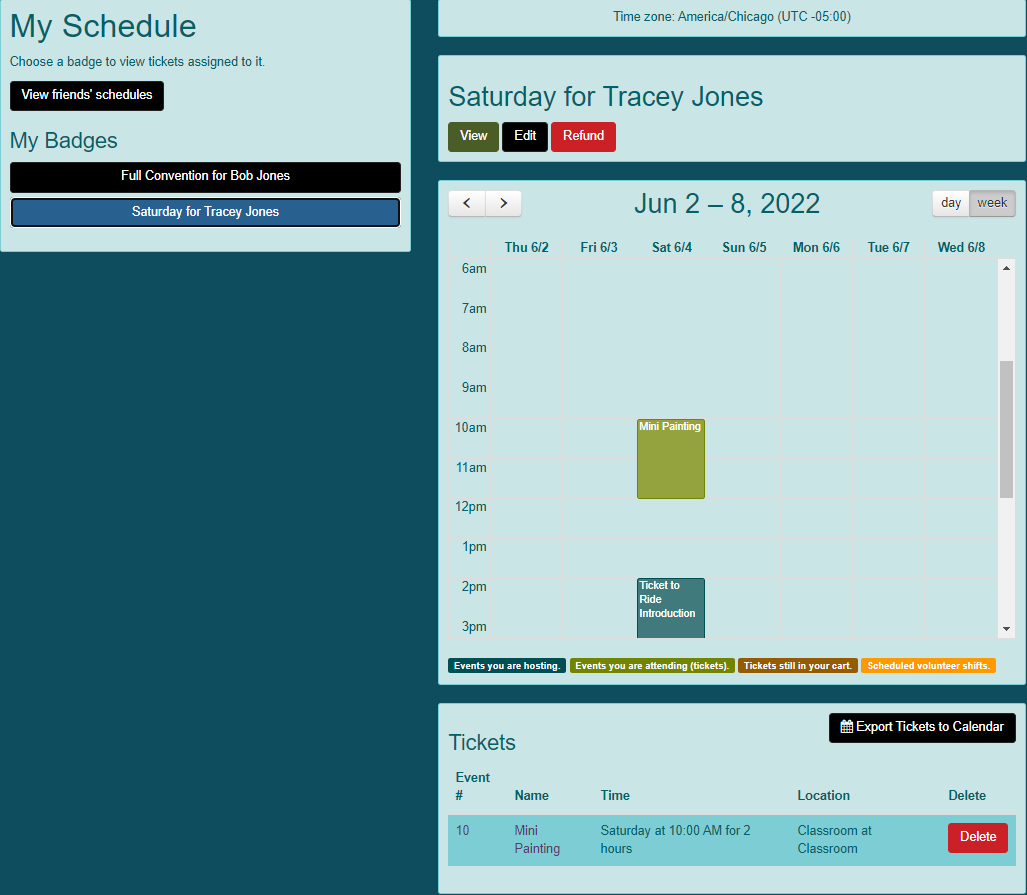
- You can also see your tickets by going to Attend > My Schedule.
- Click on a badge in the My Badges section, and you can see the schedule on the right side of the screen.
- Tickets associated with the badge are listed towards the bottom.
Reviewing Your Receipt
- If you wish to review your receipt, click on your username in the upper right hand corner of the screen.
- In the Conventions section, click on My Receipts.
- Click on the receipt number you wish to review. You do have the option to edit tickets that are still under your control.
Volunteer to Host Existing Events
Sometimes, an event will be on the schedule, but will not have an assigned host. The convention can decide if they will allow attendees to volunteer to host an event.
- Go to Attend > My Schedule from the convention home page.
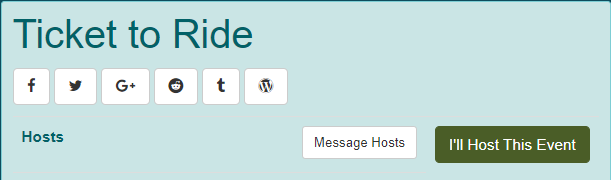
- Click on the event number or name.
- Click the "I'll Host This Event" button.
- If you change your mind, you can click "Step Down As Host" to remove yourself from the event.
- Additional information on viewing events you are hosting can be found in Submit / Host Convention Event.
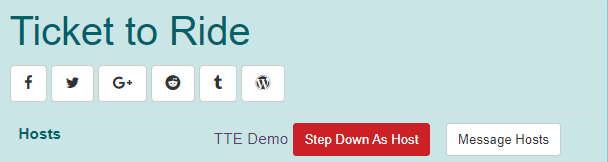
Message Host
After you have purchased a ticket to an event, you are able to send messages to the event host.
- Go to Attend > My Schedule from the convention home page.
- Click on the event number or name.
- Click on the "Message Hosts" button at the top of the page.
- Verify the Reply-To Email Address.
- Add a Message Subject.
- Add a Message Body.
- Click "Send Message".