
Activate / Manage Discount Codes
Discount codes allow you to take a fixed amount off or percentage off the cost of badges, tickets, merch, exhibitor booths, booth add-ons or sponsorships.
To setup discount codes, you must have the Allow Discounts field in Convention Tools > Financials > Settings set to Discounts Enabled.
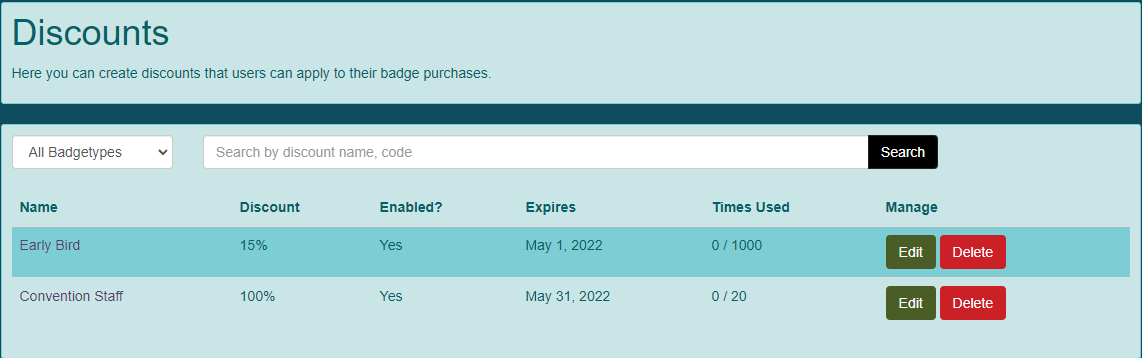
Discount Codes
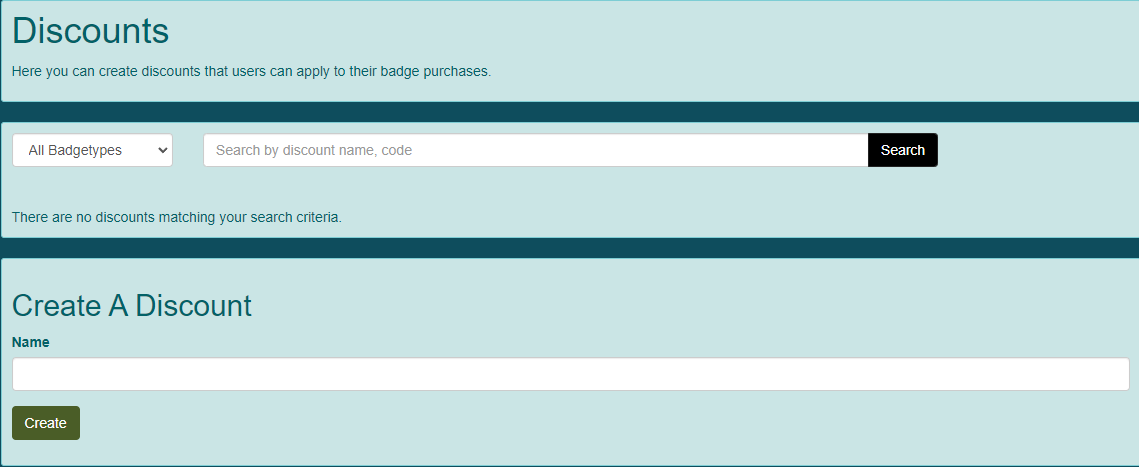
- Click on Setup Discount Codes (optional) if you are using a checklist, or go to Convention Tools > Financials > Discounts.
- This will display the Discounts screen.
- Enter a Name in the Create a Discount section then click "Create".
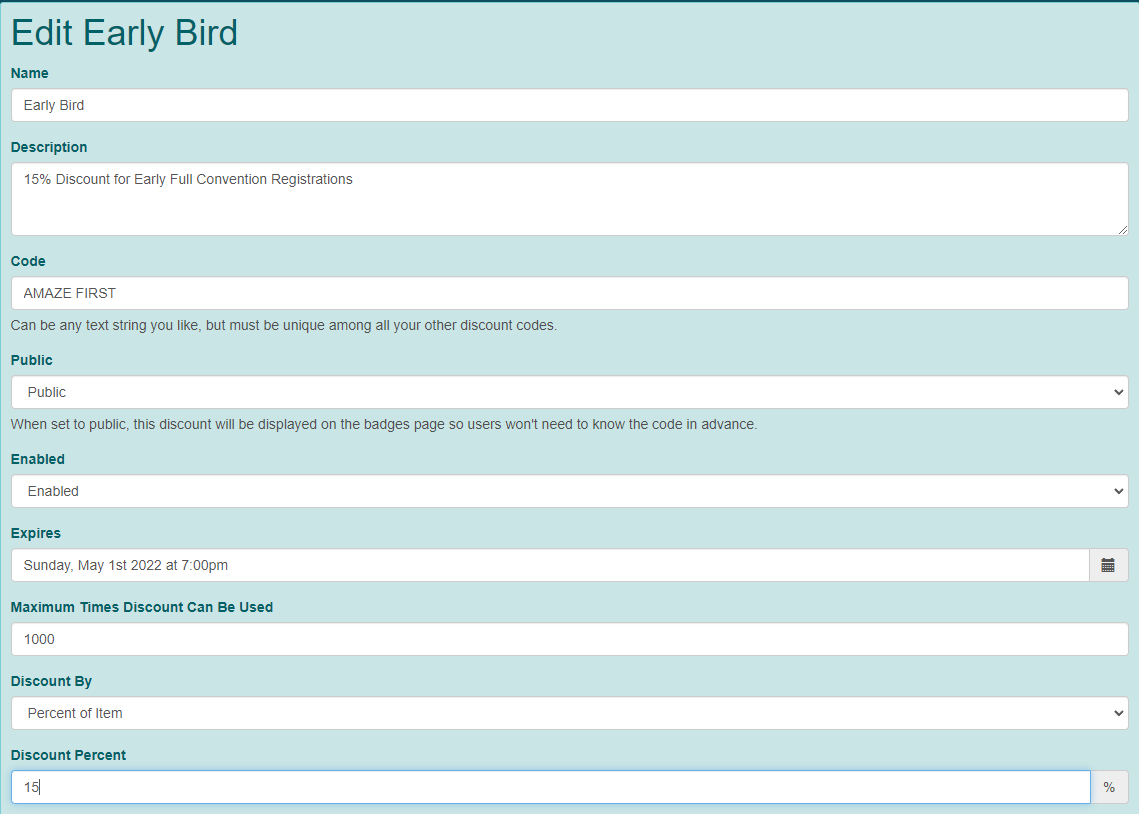
- This will display the Edit [Name] screen.
- Name: The name you specified when you created the discount.
- Description: A brief description of the discount and what it covers.
- Code: The system will automatically generate a random code for attendees to use. This random code does not have to be used. Convention organizers are allowed to change it to fit the convention needs.
- Public: When set to Public, the discount code will be visible to the attendee when they are purchasing a badge. They will have to click on the discount link to apply the discount. When set to Private, the attendee will have to know the discount code through email or some other communication. They will have to manually enter the code when purchasing a badge.
- Enabled: Enabled means the code is in use. Disabled means it is currently turned off.
- Expires: You can set a date and time when the discount will expire. This is useful when creating Early Bird discounts.
- Maximum Times Discount Can Be Used: You can set a limit to the number of times a code is able to be used. This allows you to provide a discount to the first x number of badges, or provide a private link to one person to be available for one badge purchase.
- Discount By: You can choose to discount by either Fixed Amount per Item or Percent of Item.
- Discount Amount / Discount Percent: One of these options will appear based on your answer to Discount By. Percent should be entered as a whole number.
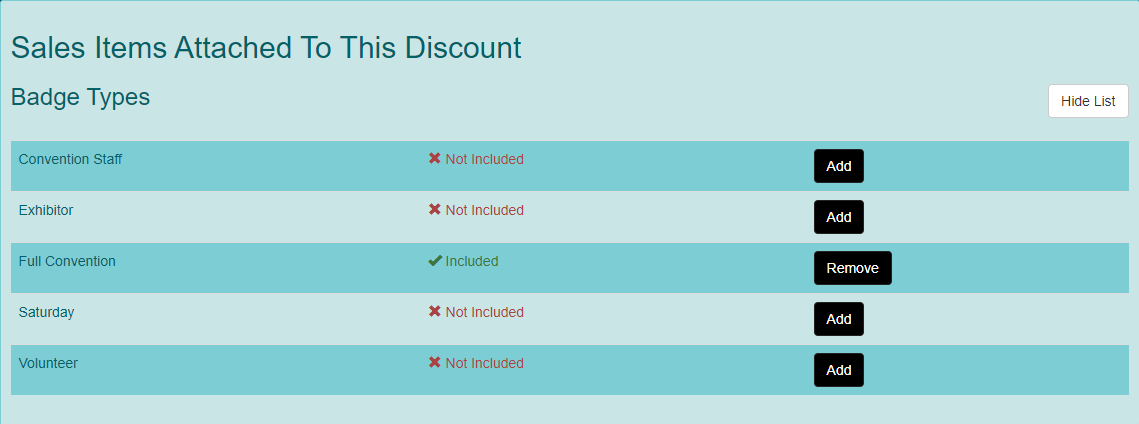
- Discount Applies To: Choose which type of items to which this discount will apply. As you apply each type, the Sales Items Attached To This Discount section will be displayed with sub sections for each item type. By default all badge types, event types, products, booth types, booth options and sponsorships are selected when you choose their item type. If you want the discount to only apply to one from the list, click "Show List" in the section and click "Add" next to the appropriate type, product, etc. Now, only the item you have added will have the discount applied.
- Click "Done" when you are finished.
- Repeat steps 3 - 4 as needed.

Import Discounts
If you have several discount codes to create, it may be easier to create them in a CSV file and upload it to TTE. A sample CSV file is available to download, and the Import Fields Help section details what information is required for each field. Once your file is built, click "Choose File" to select the new file. Click "Import Discounts from CSV File". 
